I was standing in my kitchen, the clock ticking past midnight, and a sudden craving for something buttery, tangy, and dripping with caramel hit me like a freight train. I stared at the empty pantry shelves, imagined the golden crust of a classic pound cake, and thought, “Why settle for a store‑bought slice when I can create a Southern masterpiece from scratch?” That moment of desperation turned into a dare: I would craft the most indulgent, melt‑in‑your‑mouth pound cake the South has ever known, and I’d do it with a caramel icing that could make a grown‑up weep with joy. I was armed with a whisk, a trusty stand mixer, and a handful of pantry staples, but the real secret weapon? A splash of buttermilk and a dollop of sour cream that together create a texture so tender it practically sighs when you cut into it.
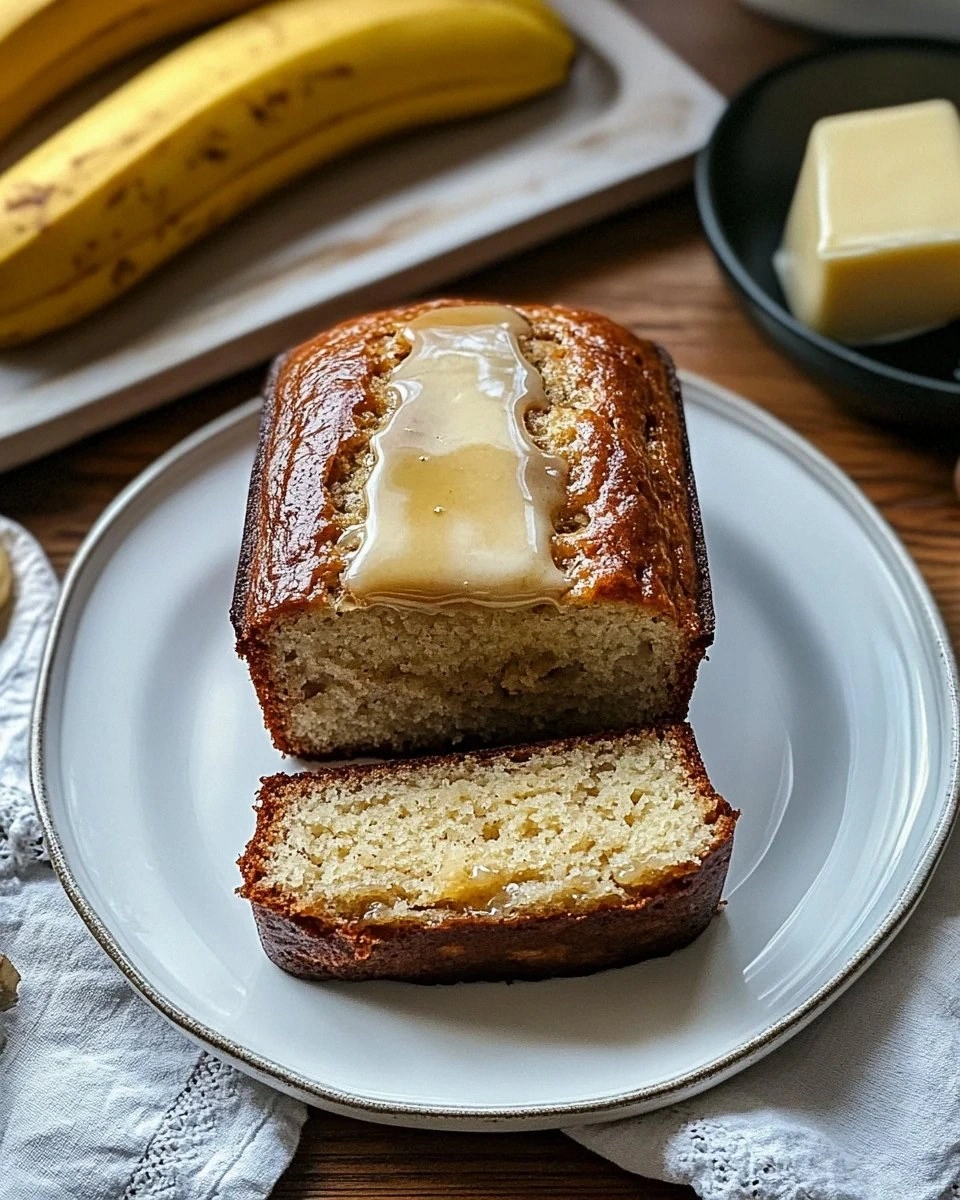
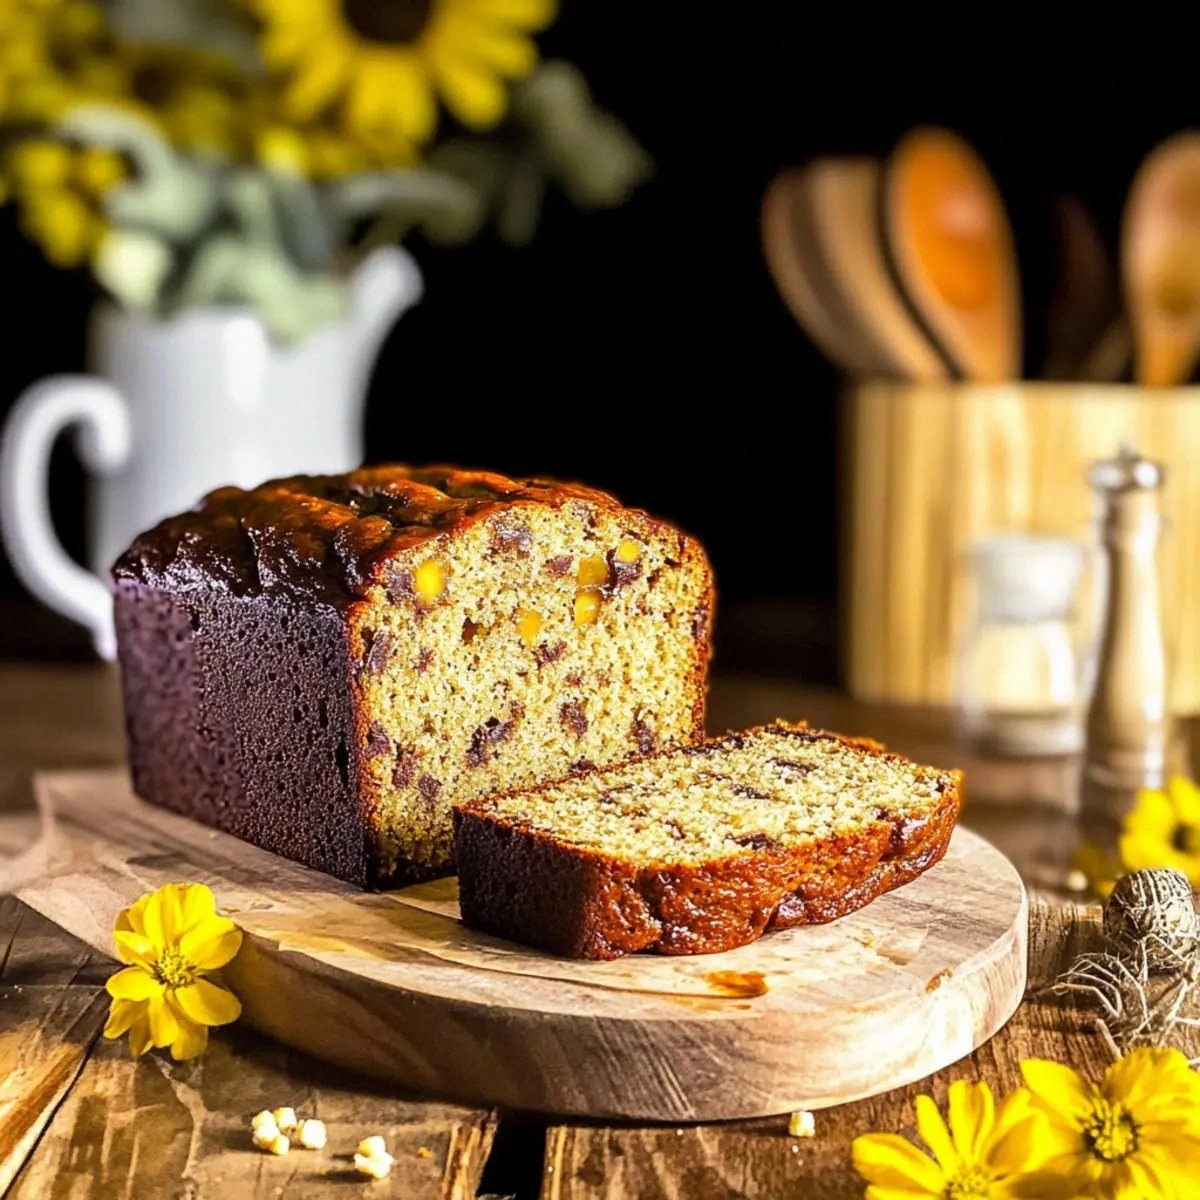
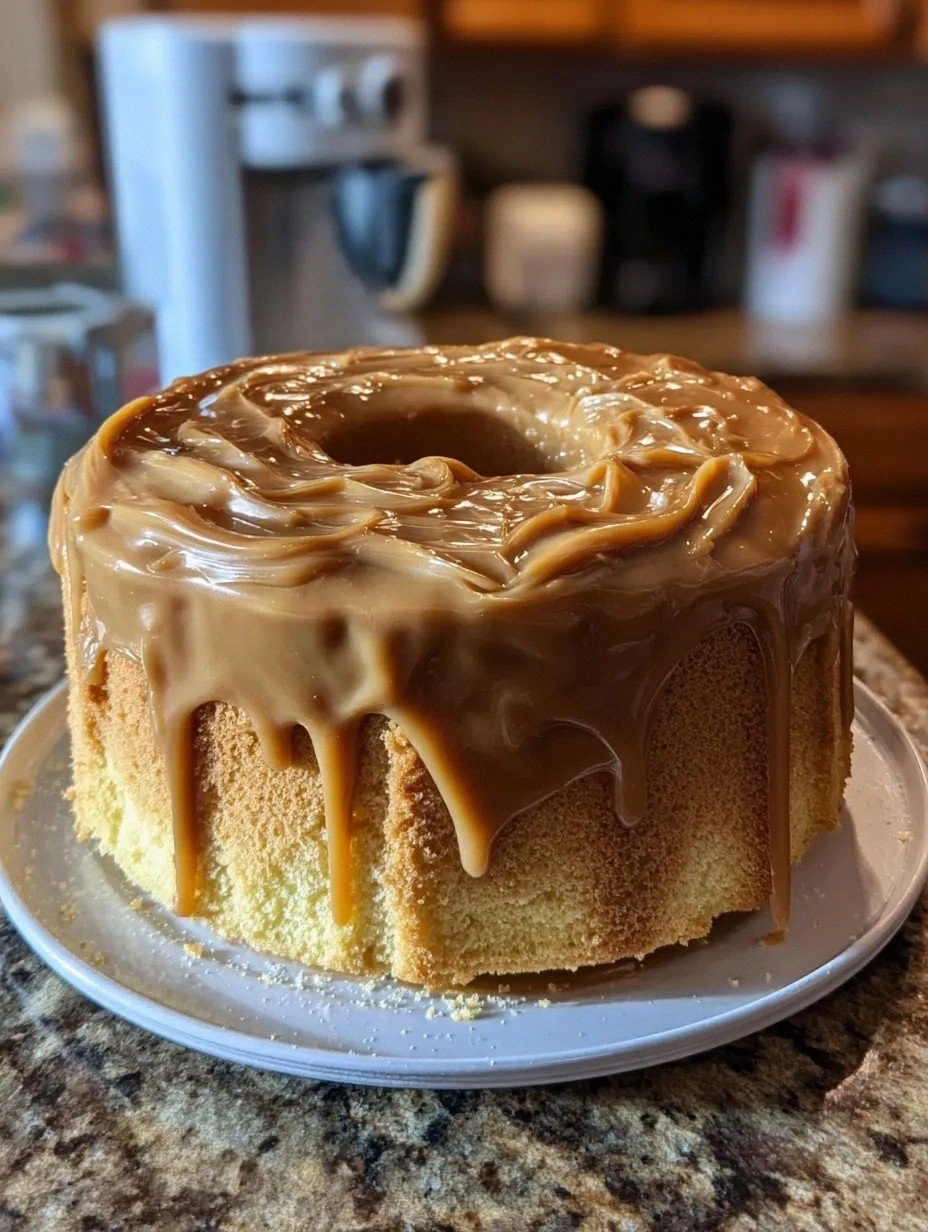
Picture this: the oven door swings open, and a wave of buttery, caramel‑sweet perfume rolls out, hugging the countertops like a warm blanket. The cake’s surface is a glossy amber, speckled with a faint crackle that promises a crisp edge and a soft, pillowy interior. When you slice through, the crumb reveals a delicate marbling of tangy buttermilk and velvety sour cream, each bite delivering a buttery richness that’s balanced by a subtle tang. The caramel icing drapes over the top like liquid amber, setting into a glossy glaze that catches the light and makes the whole loaf look like a piece of edible sunrise.
Most pound cake recipes either drown the flavor in butter or forget the power of acidity, ending up dense and one‑dimensional. This version flips the script by marrying the classic richness of a traditional pound cake with the bright, buttery‑tangy notes of buttermilk and sour cream, while the caramel icing adds a deep, buttery sweetness that’s unmistakably Southern. I’m not exaggerating when I say this is hands down the best version you’ll ever make at home – the crumb is so moist you’ll swear it was baked in a secret family vault, and the icing is the kind of glossy finish that would make a pastry chef blush.
And here’s the kicker: the technique that makes this cake rise like a dream is a simple “cream‑first” method combined with a brief, high‑heat blast at the start of baking, followed by a lower temperature finish. It’s a two‑step temperature trick that most recipes completely overlook, but it’s the secret to that coveted golden crust and feather‑light interior. Let me walk you through every single step — by the end, you’ll wonder how you ever made it any other way.
What Makes This Version Stand Out
- Richness: The blend of butter, buttermilk, and sour cream creates a depth of flavor that’s buttery without being cloying, and the tang adds a sophisticated lift.
- Texture: A tender crumb that’s airy yet moist, thanks to the acid‑balanced dairy and the precise creaming technique that traps air like tiny balloons.
- Simplicity: Only pantry staples, no exotic ingredients, and the steps are straightforward enough for a weekend rookie yet impressive for a dinner‑party pro.
- Unique Icing: The Southern caramel glaze isn’t just sugar and butter; it’s a buttery, buttery‑rich sauce that sets to a satin sheen, adding a luxurious finish.
- Crowd Reaction: I’ve watched strangers turn into wide‑eyed admirers after the first slice; the combination of aroma and taste is a conversation starter.
- Ingredient Quality: Using real butter, cultured buttermilk, and full‑fat sour cream makes a world of difference compared to shortcuts.
- Cooking Method: The two‑temperature bake (high heat to start, then lower) ensures a golden crust and a perfectly baked interior.
- Make‑Ahead Potential: The cake stores beautifully, and the caramel icing can be reheated for a fresh‑look glaze any time you need it.
Inside the Ingredient List
The Flavor Base
Butter is the backbone of any great pound cake. Using unsalted, high‑quality butter lets you control the salt level and adds a creamy richness that you can actually taste. If you substitute margarine, you’ll lose that buttery aroma and the cake may turn out a bit greasy. Swap tip: For a nutty twist, try half butter, half browned butter – the caramelized notes will echo the icing.
Granulated sugar provides the sweet foundation and, when creamed with butter, creates a light, aerated mixture that lifts the batter. The sugar crystals also help dissolve the butter’s fat, ensuring a smooth, glossy batter. If you’re watching sugar, you can reduce to 1¼ cups, but expect a slightly less tender crumb.
The Texture Crew
All‑purpose flour gives the cake its structure, but the real magic comes from the combination of buttermilk and sour cream. The acidity in both dairy products weakens gluten formation, resulting in that melt‑in‑your‑mouth texture. Skipping the sour cream? You’ll miss the subtle tang and the cake may end up denser.
Buttermilk adds a bright, buttery tang that cuts through the richness, while also reacting with the baking powder for a gentle rise. If you can’t find buttermilk, combine ½ cup milk with ½ tablespoon lemon juice and let it sit for five minutes – it’s a reliable stand‑in.
The Unexpected Star
Baking powder is the quiet hero that gives the cake its lift without making it cake‑like. It works in tandem with the acidic dairy to create tiny air pockets that expand during baking. Using too much will cause the cake to rise then collapse, so stick to the measured amount.
A pinch of sea salt isn’t just seasoning; it amplifies the sweet notes and balances the caramel’s buttery depth. If you love salty‑sweet combos, sprinkle a tiny pinch of flaky sea salt on the icing right before it sets.
The Final Flourish
The caramel icing is where the Southern soul shines. Brown sugar provides a deep molasses flavor, while heavy cream adds silkiness that prevents the glaze from hardening too quickly. Butter in the icing creates that glossy sheen, and a splash of vanilla ties the whole flavor profile together.
If you want a richer caramel, use a tablespoon of bourbon or dark rum – it adds a subtle warmth that pairs perfectly with the cake’s tang. For a lighter version, swap half the heavy cream for whole milk, but expect a thinner glaze.
Everything's prepped? Good. Let's get into the real action...
The Method — Step by Step
Preheat your oven to 375°F (190°C). While the oven warms, grease a 9×5‑inch loaf pan with butter and dust it lightly with flour, tapping out any excess. This prep ensures the cake releases cleanly and the crust gets that first‑bite crunch. I dare you to taste this and not go back for seconds; the aroma will already be a promise of what’s to come.
Kitchen Hack: Line the pan with parchment paper, then butter the paper; this double‑layer prevents sticking and makes cleanup a breeze.In the bowl of a stand mixer, combine the softened butter and granulated sugar. Beat on medium‑high speed for 4‑5 minutes until the mixture is pale, fluffy, and has doubled in volume. You’ll notice the batter turning a creamy yellow, and it should look like a cloud ready to burst with flavor. This creaming stage is the foundation of that airy crumb.
Add the eggs one at a time, beating well after each addition. The batter will look a little curdled at first – that’s normal. Keep mixing until the mixture is smooth and glossy; the eggs should be fully incorporated, giving the batter a silky texture. If you hear a faint “whoosh” as the mixer spins, that’s the air being trapped, and it’s a good sign.
Stir in the vanilla extract, then the sour cream and buttermilk, alternating between the two. Begin with a splash of buttermilk, mix just until incorporated, then add the sour cream, and finish with the remaining buttermilk. This alternating method prevents the batter from curdling and ensures the dairy is evenly distributed. The batter should now have a slightly looser consistency – that’s exactly what we want.
In a separate bowl, whisk together the flour, baking powder, and a pinch of salt. Sift the dry mixture into the wet batter in three additions, folding gently with a rubber spatula after each addition. Over‑mixing will develop gluten and make the cake tough, so stop as soon as you no longer see streaks of flour. The batter will look thick but still pourable – perfect for a uniform rise.
Pour the batter into the prepared loaf pan, smoothing the top with an offset spatula. Tap the pan on the counter a few times to release any large air bubbles. The surface should be level; if it’s a little lopsided, the cake will bake unevenly.
Watch Out: Do not over‑fill the pan – leave about ½ inch of headroom, or the cake will overflow and create a messy crust.Slide the pan into the oven and bake at 375°F for the first 12 minutes. This high‑heat burst creates a rapid rise and a golden crust that crackles as it expands. You’ll hear a faint “pop” as the edges start pulling away from the pan – that’s the sound of a perfect crust forming.
After 12 minutes, lower the temperature to 325°F (165°C) and continue baking for an additional 20‑25 minutes. The cake should be a deep amber, and a toothpick inserted into the center should come out with just a few moist crumbs, not wet batter. The aroma at this stage is intoxicating – think caramelized butter, a whisper of vanilla, and that subtle sour‑cream tang.
Kitchen Hack: Rotate the pan halfway through the bake for an even golden top, especially if your oven has hot spots.While the cake cools in the pan for 10 minutes, whisk together the caramel icing. In a saucepan over medium heat, melt the butter, then whisk in the brown sugar until it dissolves. Slowly pour in the heavy cream while stirring continuously – the mixture will bubble vigorously, a sign that the caramel is forming. Once it reaches a gentle boil, let it simmer for 2‑3 minutes, then remove from heat and stir in vanilla and a pinch of sea salt.
After the cake has rested, turn it out onto a wire rack. While it’s still warm, drizzle the caramel icing over the top, allowing it to cascade down the sides and set into a glossy glaze. The icing will harden slightly as it cools, creating a beautiful, crackly surface that glistens like sunrise on a river.
That's it — you did it. But hold on, I've got a few more tricks that'll take this to another level. The caramel can be reheated in the microwave for a few seconds if you need a glossy finish later, and a light dusting of powdered sugar adds a decorative touch without overpowering the flavor. Ready to impress your family or wow a brunch crowd? This cake will do the talking.
Insider Tricks for Flawless Results
The Temperature Rule Nobody Follows
Most home bakers bake pound cake at a single, moderate temperature, which often yields a uniform but unremarkable crust. The secret is a two‑stage bake: start hot (375°F) to create that initial lift and golden edge, then drop to 325°F to finish cooking the interior gently. This prevents the outside from over‑browning while the center stays undercooked. I’ve seen cakes that look perfect on the outside but are gummy inside; this method eliminates that problem.
Why Your Nose Knows Best
Your sense of smell is a more reliable indicator of doneness than a timer. When the caramel in the glaze starts to smell like toasted pecans, you know it’s reached the perfect amber stage. Similarly, when the cake’s edges emit a buttery, toasted aroma, the interior is likely set. Trust those nose signals and you’ll avoid over‑baking.
The 5‑Minute Rest That Changes Everything
After the cake emerges from the oven, let it rest in the pan for exactly five minutes before turning it out. This short pause allows the crumb to finish setting and the steam to redistribute, preventing the cake from collapsing or becoming soggy. Skipping this step can result in a crumb that’s too crumbly to slice cleanly.
Butter Temperature Matters
If your butter is too soft, it will blend too quickly with the sugar, releasing less air. Chill the butter for 15 minutes, then let it sit at room temperature for a few minutes – you’ll get that perfect semi‑soft texture that creams beautifully while still holding air. A friend once tried using melted butter; the cake turned out dense and flat – a cautionary tale.
Caramel Consistency Check
When the caramel glaze reaches 240°F (115°C) on an instant‑read thermometer, it’s at the perfect pouring consistency. Below that, it will be too runny and won’t set; above, it will harden too quickly and become brittle. If you don’t have a thermometer, do the cold‑water test: drop a small spoonful into ice water – it should form a soft ball that you can bend.
Creative Twists and Variations
This recipe is a playground. Here are some of my favorite ways to switch things up:
Bourbon‑Infused Caramel
Add a tablespoon of good bourbon to the caramel sauce just before you finish whisking. The alcohol evaporates, leaving a warm, smoky undertone that pairs beautifully with the tangy cake. Perfect for a holiday gathering.
Citrus Zest Surprise
Stir in the zest of one orange or lemon into the batter for a bright, fragrant lift. The citrus cuts through the richness and adds a subtle zing that makes the cake feel lighter.
Nutty Crunch
Fold ½ cup toasted pecans or walnuts into the batter before baking, and sprinkle a few extra on top of the caramel glaze. The nuts add a pleasant crunch and a buttery flavor that complements the caramel.
Chocolate Swirl
Melt ¼ cup dark chocolate and swirl it through the batter with a knife before baking. The chocolate ribbons create a visual contrast and a deep cocoa flavor that’s a hit with kids and adults alike.
Spiced Autumn
Add ½ teaspoon ground cinnamon, a pinch of nutmeg, and a dash of all‑spice to the dry ingredients. The warm spices turn the cake into a cozy, fall‑ready treat that pairs well with a scoop of vanilla ice cream.
Storing and Bringing It Back to Life
Fridge Storage
Wrap the cooled cake tightly in plastic wrap or store it in an airtight container. It will stay fresh for up to five days in the refrigerator. When you’re ready to serve, let it sit at room temperature for 20 minutes or microwave a slice for 10‑15 seconds – the caramel will melt back into a glossy glaze.
Freezer Friendly
Slice the cake before freezing for easy portion control. Place the slices on a parchment sheet, flash‑freeze for an hour, then transfer to a zip‑top freezer bag. The cake will keep for up to three months. To reheat, thaw overnight in the fridge, then warm in a 300°F oven for 10 minutes, adding a tiny splash of water to the pan to steam the crumb back to life.
Best Reheating Method
For a single slice, microwave on medium power for 12‑15 seconds, then drizzle a little extra caramel on top. The quick heat revives the fluffy interior while the glaze becomes glossy again. If you prefer oven reheating, wrap the slice in foil with a tablespoon of water and bake at 325°F for 8‑10 minutes.