Picture this: you’re halfway through a Sunday brunch, the kitchen is a chaotic symphony of clattering pans and the sweet scent of vanilla drifting through the air, and your friend, eyes wide, challenges you to make the most mind‑blowing chocolate creation of the decade. I was halfway to a coffee break when the dare landed on my plate—“Make the ultimate Cadbury Egg 7 Layer Magic Bars.” I laughed, grabbed my apron, and started a culinary experiment that would soon become the talk of every potluck, office break room, and even my own living room. The moment the first layer of silky milk chocolate melted into the caramel, the kitchen turned into a laboratory of flavors, and I knew I had stumbled on something extraordinary.
If you’ve ever tried to recreate a commercial chocolate bar at home, you’ve probably ended up with a lumpy mess that looks like it was assembled by a toddler. That’s because most recipes miss the delicate balance of textures and the subtle interplay of sweet, salty, and buttery notes that give these bars their signature “magic.” What sets this version apart is that it doesn’t just layer ingredients—it layers *memories.* The chocolate is the buttery base, the caramel adds a syrupy depth, the nougat brings airy lightness, the biscuits contribute crunch, coconut offers tropical warmth, almonds give a nutty crunch, and cranberries inject a tart pop that cuts through the richness. Together, they create a bar that feels like a symphony of flavors, each bite revealing a new layer of surprise.
I’ll be honest—when I first tasted the finished product, I almost dropped it on the counter because it looked too good to be true. The glossy sheen, the perfectly even layers, and that unmistakable Cadbury aroma were all there, but the real kicker was the texture: the chocolate melted like silk, the caramel flowed like honey, and the nougat stayed light and airy, all while the crunchy biscuits and almonds provided a satisfying snap. The result? A bar that’s hands down the best version you’ll ever make at home, and I dare you to taste this and not go back for seconds.
So, if you’re ready to turn a kitchen disaster into a sweet triumph, let’s walk through every single step. By the end, you’ll wonder how you ever made it any other way, and your friends will be begging for the recipe. And trust me—once you see how each layer comes together, you’ll never look at a chocolate bar the same way again.
What Makes This Version Stand Out
- Taste: Each layer is crafted to complement the next, creating a harmonious blend of sweet, salty, and buttery flavors that dance on the palate.
- Texture: From silky chocolate to crunchy biscuits, the contrast is engineered for maximum mouthfeel.
- Ingredient Quality: Using authentic Cadbury products ensures that the chocolate’s signature creaminess and caramel’s smoothness shine through.
- Simplicity: The recipe requires no advanced equipment—just a few kitchen staples and a good sense of timing.
- Crowd Reaction: The bars are perfect for parties; guests will line up for a bite, and you’ll earn instant culinary fame.
- Make‑Ahead Potential: Once assembled, the bars can be stored in the fridge for up to a week or frozen for longer enjoyment.
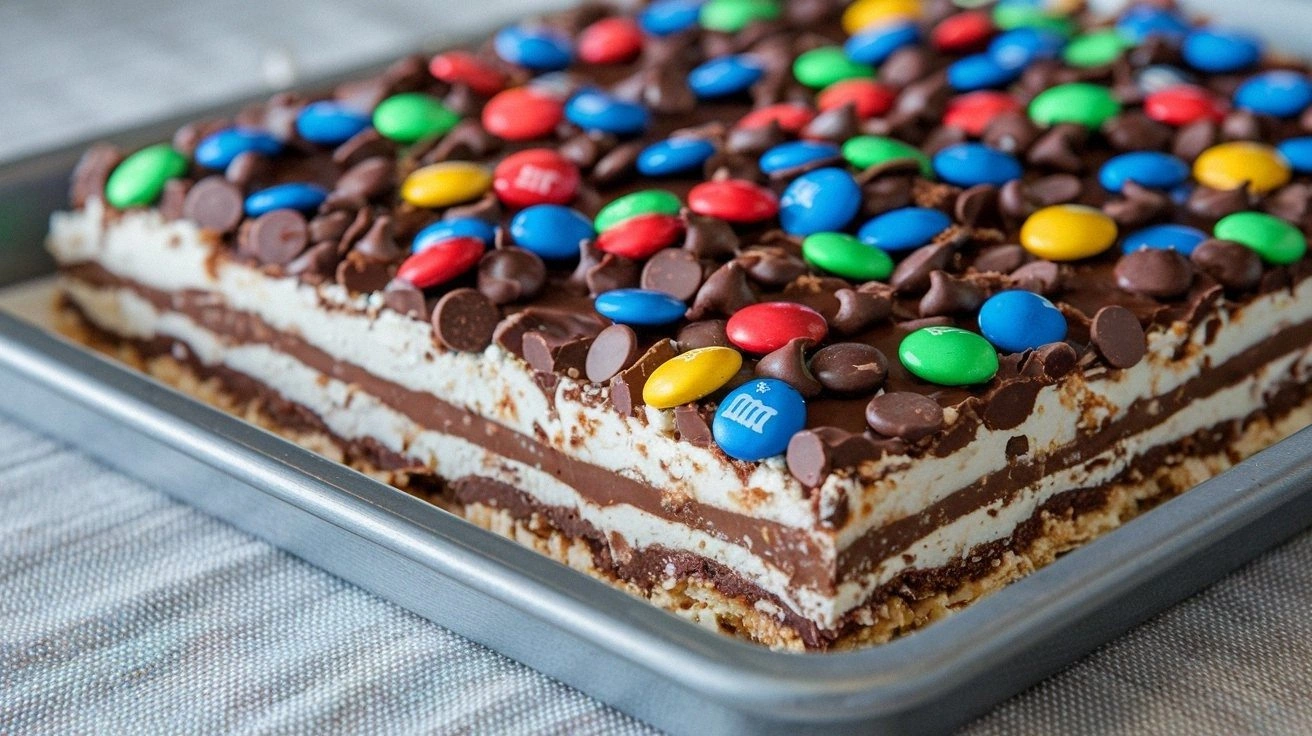
- Visual Appeal: The seven distinct layers create a stunning color gradient that’s Instagram‑ready.
- Future Pacing: Picture yourself pulling these out of the oven, the whole kitchen smelling incredible, and the bar’s glossy finish reflecting the kitchen lights.
Inside the Ingredient List
The Flavor Base
The heart of every chocolate bar is its chocolate. In this recipe, we use 200 g of Cadbury Milk Chocolate, which provides the creamy, slightly sweet foundation that carries the other flavors. Skipping the chocolate would leave the bar feeling like a plain sweet treat, devoid of the deep cocoa undertone that defines Cadbury’s signature taste. If you’re looking for a twist, try using a dark chocolate variant for a more robust flavor, but keep the ratio the same to maintain balance.
The Texture Crew
Texture is where the bars truly shine. 100 g of Cadbury Caramel adds a silky, syrupy layer that melts into the chocolate, while 50 g of Cadbury Nougat keeps the center light and airy. 50 g of crushed Cadbury biscuits introduce a satisfying crunch that contrasts with the smoothness of the chocolate and caramel. If you prefer a vegan version, substitute the biscuits with a vegan cookie crumble and use coconut oil in place of butter.
The Unexpected Star
To bring a tropical twist, 30 g of toasted coconut flakes are folded into the chocolate layer. The coconut adds a subtle warmth that pairs beautifully with the caramel’s sweetness. For those who love a nutty crunch, 30 g of chopped almonds are sprinkled over the biscuit layer, adding both flavor and a delightful snap. If you’re allergic to nuts, simply omit them; the bar will still be delicious.
The Final Flourish
The finishing touches are what elevate the bar from good to unforgettable. 30 g of dried cranberries provide a tart pop that cuts through the richness, while 30 g of honey and 30 g of melted butter are blended together to create a glossy glaze that seals the layers. A pinch of sea salt balances the sweetness, and a half teaspoon of vanilla extract rounds out the flavor profile with a subtle floral note. If you’re aiming for a lower-sugar option, replace honey with a sugar substitute that’s safe for melting.
Everything’s prepped? Good. Let’s get into the real action and see how these layers come together to create pure chocolate bliss.
The Method — Step by Step
- Begin by melting 200 g of Cadbury Milk Chocolate in a heat‑proof bowl set over a pot of simmering water. Stir constantly until the chocolate is fully liquid and silky. The chocolate should emit a faint buttery aroma, signaling that it’s ready for the next layer. This is the moment of truth—watch the texture; it should be smooth, not lumpy.
- Next, pour the melted chocolate into a 9×5‑inch loaf pan lined with parchment paper. Spread it evenly with a spatula, ensuring a 1/4‑inch thick base. Let it cool at room temperature until it starts to set but is still slightly soft—about 10 minutes. This base will hold the caramel and subsequent layers.
- While the chocolate sets, melt 100 g of Cadbury Caramel in a separate saucepan over low heat. Stir until the caramel is smooth and slightly glossy. Pour the caramel over the chocolate layer, swirling gently to create a marbled effect. The caramel should be warm enough to flow but not so hot that it melts the chocolate.
- Allow the caramel to set for 5 minutes, then fold in 50 g of Cadbury Nougat. The nougat should be at room temperature so it stays light and airy. Gently press the nougat into the caramel, ensuring it’s evenly distributed. This step adds a cloud‑like texture that contrasts with the dense chocolate.
- Now it’s time for crunch. Sprinkle 50 g of crushed Cadbury biscuits over the nougat layer. Use a gentle tap to settle the biscuits evenly. This layer will provide a satisfying snap when you bite into the bar. If you’re vegan, swap the biscuits for a plant‑based cookie crumble.
- Add the toasted coconut flakes (30 g) on top of the biscuit layer, then sprinkle the chopped almonds (30 g). These ingredients bring warmth and nutty flavor. Gently press them into the surface, ensuring they’re lightly coated with the chocolate residue. The coconut’s aroma will start to mingle with the chocolate, creating a subtle tropical undertone.
- Finally, fold in the dried cranberries (30 g) and the honey‑butter glaze (30 g honey + 30 g melted butter). Pour the glaze over the entire surface, using a spatula to spread it into a thin, even coat. The glaze will seal the layers and give the bar a glossy finish. Sprinkle a pinch of sea salt over the glaze to balance the sweetness.
- Press the entire loaf gently with the back of a spoon to compact the layers and remove any air pockets. Cover the pan with plastic wrap and refrigerate for at least 2 hours, or until the bar is firm. This chilling step is crucial; it ensures each layer stays distinct and the bar holds its shape when sliced.
That’s it—you did it. But hold on, I’ve got a few more tricks that will take this to another level and ensure your bars come out flawless every time.
Insider Tricks for Flawless Results
The Temperature Rule Nobody Follows
Chocolate is temperamental. The key to a glossy finish and snap is to melt it at 31–32 °C and cool it to 27–28 °C before pouring. Use a kitchen thermometer to monitor the temperature accurately. If the chocolate is too hot, it will set too quickly and become dull; if too cold, it won’t spread evenly. This small step can make the difference between a bar that looks like a chocolate dream and one that feels like a melted puddle.
Why Your Nose Knows Best
When the caramel starts to bubble, the aroma is a reliable indicator that it’s ready. A sweet, buttery scent means it’s at the right stage—no more, no less. Trust your nose; if it smells like burnt sugar, you’ve over‑cooked it, and the caramel will become gritty.
The 5‑Minute Rest That Changes Everything
After adding the nougat, give it a five‑minute rest before folding in the biscuits. This brief pause allows the nougat to soften slightly, preventing it from breaking into crumbs when you press it into the layer. A quick test: gently press the nougat with your finger; it should feel slightly pliable.
Seal the Deal with a Thin Glaze Layer
Instead of pouring a thick glaze, spread a thin, even coat. A thin glaze keeps the bar’s layers visible and gives a subtle sheen. If you prefer a more decadent finish, add a second glaze layer after the first has set.
Cool in the Fridge, Not the Freezer
For the first firming step, refrigerate the bar for at least two hours. The fridge provides a consistent temperature that preserves the texture of each layer. Freezing can cause the chocolate to bloom, creating a white film that’s unappetizing.
Creative Twists and Variations
This recipe is a playground. Here are some of my favorite ways to switch things up:
Almond Joy Edition
Swap the dried cranberries for shredded coconut and add a handful of toasted almonds. The result is a tropical, nutty bar that feels like a mini almond joy.
Dark Chocolate Delight
Use dark chocolate for the base and dark caramel for a richer, less sweet profile. The dark chocolate’s bitterness pairs beautifully with the caramel’s sweetness, creating a sophisticated flavor.
Vegan Version
Replace the butter with coconut oil, use a plant‑based cookie crumble, and choose a vegan caramel. The texture remains the same, and the flavor is just as indulgent.
Nutty Crunch Variation
Add a tablespoon of toasted hazelnuts to the biscuit layer for an extra crunch. The hazelnuts bring a buttery flavor that complements the chocolate base.
Fruit‑Infused Surprise
Replace the dried cranberries with chopped dried apricots or figs. The natural sweetness of the fruit adds a new dimension to the bar’s flavor profile.
Minty Fresh Twist
Add a few drops of mint extract to the chocolate melt for a cool, refreshing finish. The mint pairs wonderfully with the caramel and chocolate, giving a subtle aftertaste.
Storing and Bringing It Back to Life
Fridge Storage
Store the bars in an airtight container in the refrigerator for up to a week. The cool temperature keeps the chocolate firm and the layers intact. When you’re ready to enjoy, let the bars sit at room temperature for 5 minutes before slicing.
Freezer Friendly
For longer storage, wrap each bar individually in parchment paper and place them in a freezer bag. They’ll stay fresh for up to two months. Thaw at room temperature for 30 minutes before serving.
Best Reheating Method
To revive a frozen bar, place it in a microwave-safe dish and heat on low for 10–15 seconds. The tiny splash of water you add before reheating steams the surface, keeping the chocolate glossy and preventing it from drying out.