I was halfway through a week of bland, cookie‑free life when my roommate burst into the kitchen, eyes wide and cheeks flushed from the smell of something sweet. She had just opened a box of cherry pie filling and declared, “We need to make cookies that taste like a cherry pie, but in cookie form!” That was the moment a culinary crisis turned into a daring experiment. I grabbed my trusty stand mixer, a can of cherry pie filling, and a handful of butter, and I set out to create the most unforgettable cherry‑pie cookie anyone has ever tasted. If you’re reading this, you’re about to discover how to turn a simple pantry staple into a show‑stopping treat that will have everyone asking for the recipe.
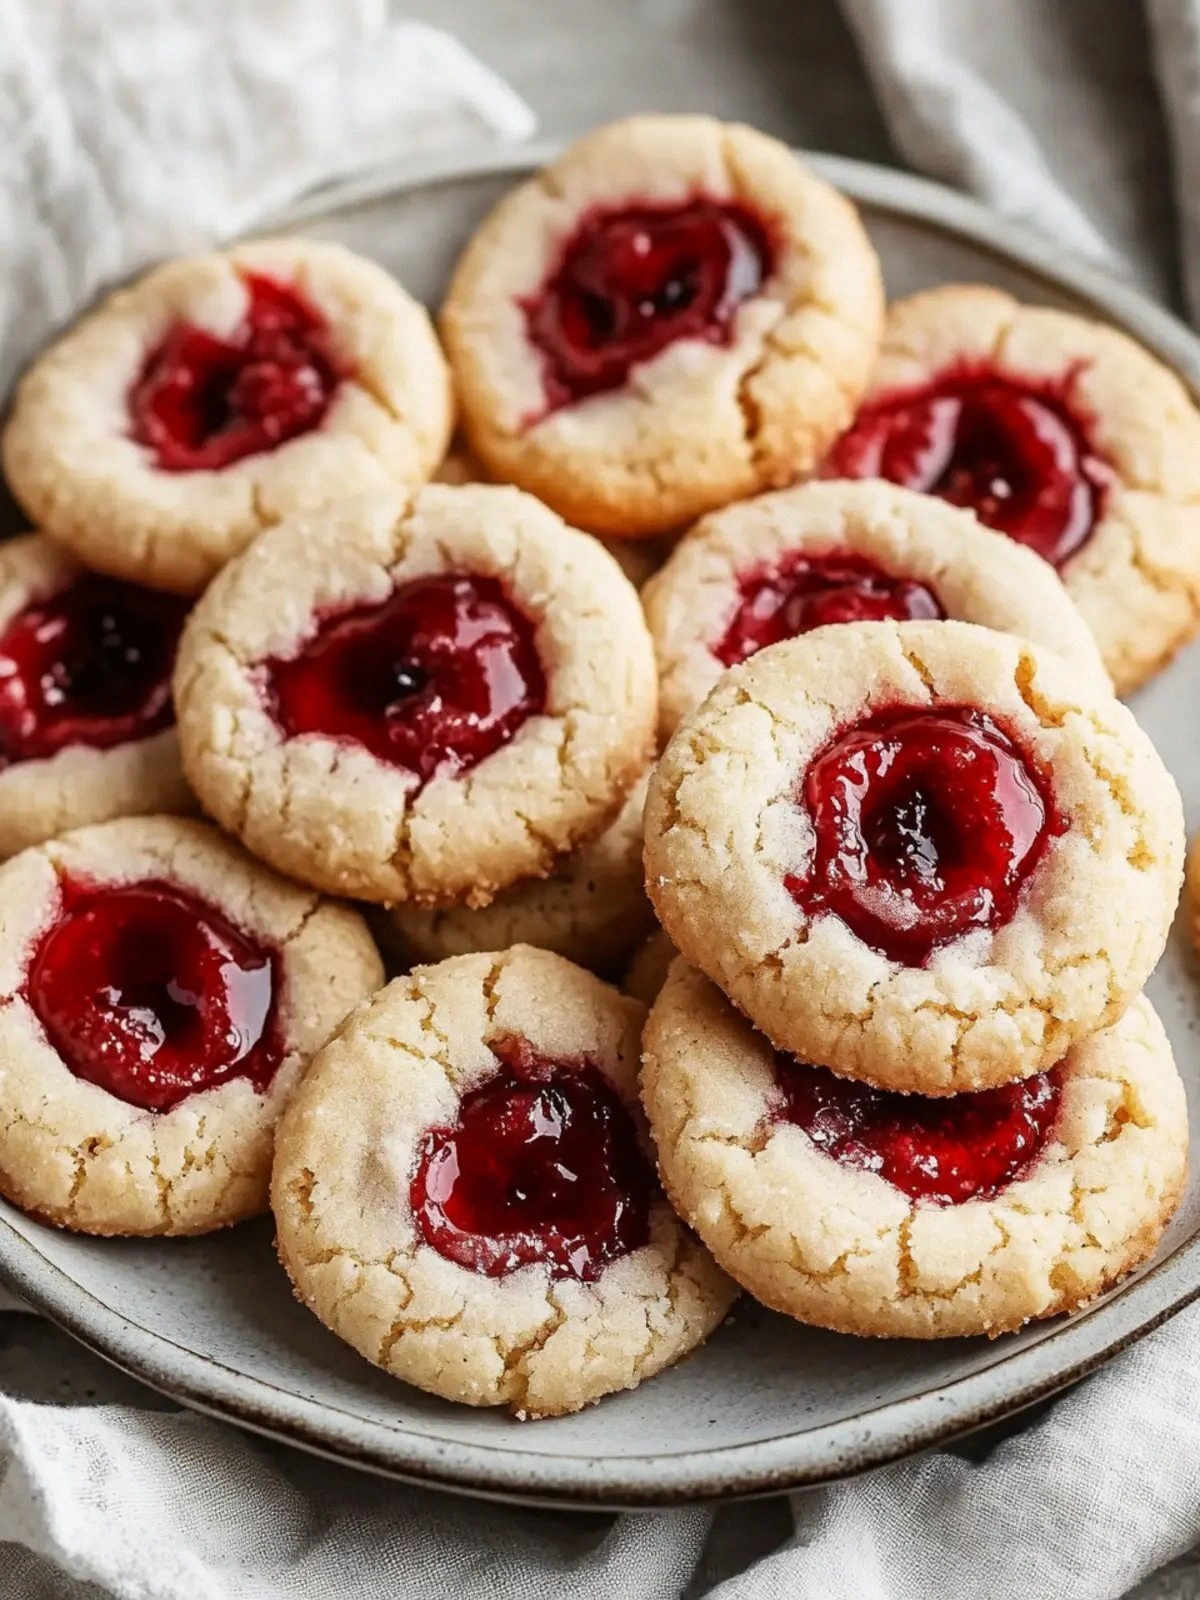
Picture this: the oven preheats to a gentle, comforting warmth, the air in the kitchen thickens with the scent of butter melting and sugar caramelizing, and the moment you lift a cookie from the sheet, its surface gleams like a tiny, edible sunrise. The first bite is a burst of sweet cherries, followed by a buttery, slightly crisp crust, and a soft, sugary center that melts in your mouth. The flavor profile is layered—sweet, tart, buttery, with a hint of vanilla that lingers like a secret. It’s not just a cookie; it’s a nostalgic trip to a family kitchen, a slice of summer, and a bite of comfort all rolled into one.
What sets this recipe apart is the meticulous balance of textures and flavors, the clever use of two distinct powdered sugar layers, and the addition of shortening to give that delicate flakiness you crave in a perfect cookie. Most recipes for cherry‑pie cookies end up either too sweet or too heavy, but this version delivers a crisp edge that snaps like a fine crystal, while the interior stays moist enough to keep the cherries from drying out. I dare you to taste this and not go back for seconds. Trust me, your taste buds will thank you.
I’ll be honest—after the first batch, I ate half before anyone else got a chance to try it. That’s the power of a great cookie: it’s addictive, comforting, and downright irresistible. And if you’re still skeptical, let me walk you through every single step. By the end, you’ll wonder how you ever made cherry‑pie cookies any other way.
What Makes This Version Stand Out
- Taste: The cherry filling is the star, but the vanilla paste lifts it, creating a flavor profile that feels both classic and elevated. The subtle tartness of the cherries balances the buttery base, preventing the cookie from becoming cloyingly sweet.
- Texture: A two‑layer powdered sugar approach gives the cookie a light, airy crumb that cracks pleasantly when bitten, while the shortening keeps the edges tender and the center chewy.
- Simplicity: With only 11 ingredients—most of which you already have at home—you’ll have a cookie ready in under an hour. No need for exotic spices or obscure baking techniques.
- Uniqueness: The combination of two powdered sugar amounts and the addition of heavy cream is a twist that most cherry‑pie cookie recipes overlook, resulting in an extra sweet, slightly caramelized finish.
- Crowd Reaction: Friends who’ve tasted these cookies say they’re “the best version you’ll ever make at home.” They’re perfect for parties, potlucks, or a quiet afternoon snack.
- Ingredient Quality: Using high‑quality butter and a premium cherry pie filling makes all the difference. The butter’s fat content gives the cookie a rich mouthfeel, while the pie filling’s natural sweetness eliminates the need for extra sugar.
- Make‑Ahead Potential: Once baked, these cookies keep their freshness for a full week when stored properly. They’re also freezer‑friendly, so you can bake a batch ahead of time and enjoy whenever the craving strikes.
Inside the Ingredient List
The Flavor Base
The butter is the heart of this cookie, providing a buttery richness that melts in your mouth. Use unsalted butter for precise control over the salt level; it’s the difference between a cookie that tastes just right and one that’s overly salty. If you’re in a hurry, a pre‑measured butter block will save time and reduce mess.
The Texture Crew
Shortening is the secret weapon that keeps the cookies tender and prevents them from spreading too much. It also adds a subtle sheen that makes the finished product look professionally baked. The two teaspoons of baking powder give the cookies a slight lift, ensuring they rise just enough to be airy but not too puffed.
The Unexpected Star
The 21‑oz can of cherry pie filling is the flavor powerhouse. It adds natural sweetness and a vibrant tartness that cuts through the richness of the butter and shortening. If you’re a fan of tartness, feel free to add a splash of lemon zest to the dough for an extra zing.
The Final Flourish
The second layer of powdered sugar, combined with heavy cream, gives the cookie a sweet, caramelized finish. The heavy cream adds moisture and a silky texture, preventing the cookie from becoming too dry. If you prefer a lighter cookie, replace half of the powdered sugar with cocoa powder for a chocolate‑cherry twist.
Everything’s prepped? Good. Let’s get into the real action.
The Method — Step by Step
- Preheat the oven to 350°F (175°C) and line a baking sheet with parchment paper or lightly grease it with butter. The oven’s steady heat will create a uniform baking environment that ensures each cookie cooks evenly. While the oven warms, gather all your ingredients and have them within arm’s reach.
- In a large mixing bowl, beat the butter with the first 1.5 cups powdered sugar using a hand mixer or stand mixer until the mixture is light, fluffy, and pale. This step is crucial for incorporating air into the dough, which gives the cookies their signature lift. Keep mixing until the sugar is fully dissolved and the mixture feels airy to the touch.
- Add the egg, vanilla paste, and the cup of shortening, beating until the mixture is silky and the shortening is fully incorporated. The shortening will help the cookies retain their shape and create a tender crumb. Mix just until the ingredients are well combined; overmixing can cause the dough to become tough.
- In a separate bowl, whisk together the all‑purpose flour, baking powder, and salt. This dry blend is the backbone of the cookie, giving it structure and lift. Whisking the dry ingredients separately ensures even distribution and prevents clumps in the dough.
- Gradually fold the dry mixture into the wet until just combined; you don’t want to overmix. The dough should be cohesive but still a bit shaggy, like a soft dough that will hold shape. This gentle folding preserves the airy pockets created during the creaming step.
- Stir in the 21‑oz cherry pie filling, folding gently until the filling is evenly distributed throughout the dough. The cherries add a burst of flavor and a hint of tartness that balances the sweetness. Be careful not to break up the cherries too much; a few whole pieces add visual appeal.
- Add the second 2.5 cups powdered sugar and the 2 tablespoons heavy cream, mixing until the dough comes together into a ball. The extra sugar gives the cookies a sweet finish, while the cream adds moisture and a silky texture. The dough should be smooth and slightly tacky, but not sticky.
- Chill the dough in the refrigerator for at least 30 minutes; this step is critical for achieving that perfect bite‑size cookie that holds its shape and doesn’t spread too much. Cold dough also enhances flavor by allowing the butter to firm up, which creates a crisp edge during baking.
- Scoop tablespoon‑sized balls of dough onto the prepared baking sheet, spacing them about 2 inches apart. Gently press each ball down a bit to create a small disc; the cookies should be round and compact. This uniform size ensures even baking and a consistent texture.
- Bake for 12‑14 minutes, or until the edges are lightly golden and the centers are set but still soft. Remove from the oven and let the cookies cool on the sheet for 5 minutes before transferring them to a wire rack to finish cooling. The cookies will continue to set as they cool, achieving the perfect balance of crisp and chewy.
Insider Tricks for Flawless Results
The Temperature Rule Nobody Follows
Many bakers bake at 375°F, but 350°F is the sweet spot for these cookies. The lower temperature allows the butter to melt slowly, creating a tender crumb while still achieving a golden edge. If you’re using a convection oven, reduce the temperature by 25°F to avoid over‑browning.
Why Your Nose Knows Best
Trust your sense of smell during baking. When the cookies start to emit a caramelized, buttery aroma, you’re in the sweet spot. If the scent is too sweet, they’re overbaked; if it’s too faint, they need a few more minutes.
The 5‑Minute Rest That Changes Everything
Letting the cookies rest on the sheet for 5 minutes after baking locks in moisture and allows the edges to set perfectly. This simple step ensures the cookies don’t crumble when you transfer them to a rack. A quick rest also lets the flavors meld together.
Keep It Cool, Keep It Fresh
Store the cooled cookies in an airtight container at room temperature for up to a week. The airtight seal prevents the cookies from drying out and preserves the buttery flavor. If you’re storing them for longer, consider freezing them in a freezer bag.
The Secret to a Perfect Center
Scoop the dough into slightly larger balls if you prefer a chewier center. A smaller ball will produce a crispier cookie but may not hold the cherry filling as well. Experiment with size to find your preferred texture.
Add a Touch of Salt for Depth
A pinch of sea salt on top of each cookie before baking brings out the sweetness of the cherries and the richness of the butter. Salt is a flavor enhancer that can elevate even the simplest of desserts.
Creative Twists and Variations
This recipe is a playground. Here are some of my favorite ways to switch things up:
Chocolate Cherry Dream
Replace the second 2.5 cups of powdered sugar with an equal amount of cocoa powder and add a tablespoon of chocolate chips to the dough. The result is a chocolate‑cherry cookie that’s rich and decadent, perfect for chocolate lovers.
Nutty Cherry Crunch
Fold in ½ cup of chopped toasted walnuts or pecans for a nutty crunch that pairs wonderfully with the sweet cherries. The nuts add a delightful texture and a hint of earthiness.
Spiced Cherry Delight
Add ¼ teaspoon of ground cinnamon and a pinch of nutmeg to the dry mixture for a warm, spiced flavor. The spices complement the cherries and give the cookies a cozy, autumnal vibe.
Lemon Zest Surprise
Grate the zest of one lemon into the dough for a bright, citrusy note that cuts through the sweetness. The lemon zest pairs beautifully with the cherries, adding a refreshing twist.
Mini Cherry Pecan Bars
Press the dough into a lined baking pan to form a thick bar, bake, then cut into squares. The bars are easier to serve at gatherings and hold the cherry filling beautifully.
Gluten‑Free Edition
Swap the all‑purpose flour for a gluten‑free blend that matches the same weight. Make sure the blend contains xanthan gum; otherwise, the cookies may not hold together.
Storing and Bringing It Back to Life
Fridge Storage
Place the cooled cookies in a shallow airtight container or a zip‑top bag. Store in the refrigerator for up to a week. The cold environment keeps the butter from softening too quickly, preserving the cookie’s texture.
Freezer Friendly
For longer storage, wrap each cookie individually in parchment paper and place them in a freezer bag. They stay fresh for up to three months. When ready to enjoy, let them thaw at room temperature for 10–15 minutes.
Best Reheating Method
To revive a stale cookie, preheat the oven to 300°F (150°C). Place the cookies on a baking sheet and heat for 3–5 minutes, just until warmed through. Add a tiny splash of water to the dough before baking to steam back to perfection.