I was in the middle of a chaotic Sunday brunch, juggling a dozen dishes when the kitchen alarm sounded: the chocolate mousse I’d been working on had turned into a sticky, lumpy disaster that could only be described as “melting into the floor.” I stared at the ruined batch, heart sinking, until a friend tossed me a dare: “Make a vegan chocolate dessert that actually tastes like chocolate and still feels indulgent.” I laughed, but the challenge sparked something. That night, I set out to create a version that would have you saying, “I dare you to taste this and not go back for seconds.”
Picture the scene: the kitchen lights flicker, the aroma of toasted cocoa powder drifts through the air, and a faint citrus tang lingers from a freshly squeezed lemon. The sound of the blender whirring is a comforting hum that steadies my nerves. I can almost taste the first spoonful—rich, silky, with a subtle brightness that wakes the palate. The texture feels like a cloud that melts instantly, leaving a lingering, velvety aftertaste that makes you reach for more. The moment you close your eyes, you can hear the faint crackle of a sugar crystal dissolving, and the faint metallic taste of avocado oil blending into the mix. It’s a sensory symphony that I can’t wait to share.
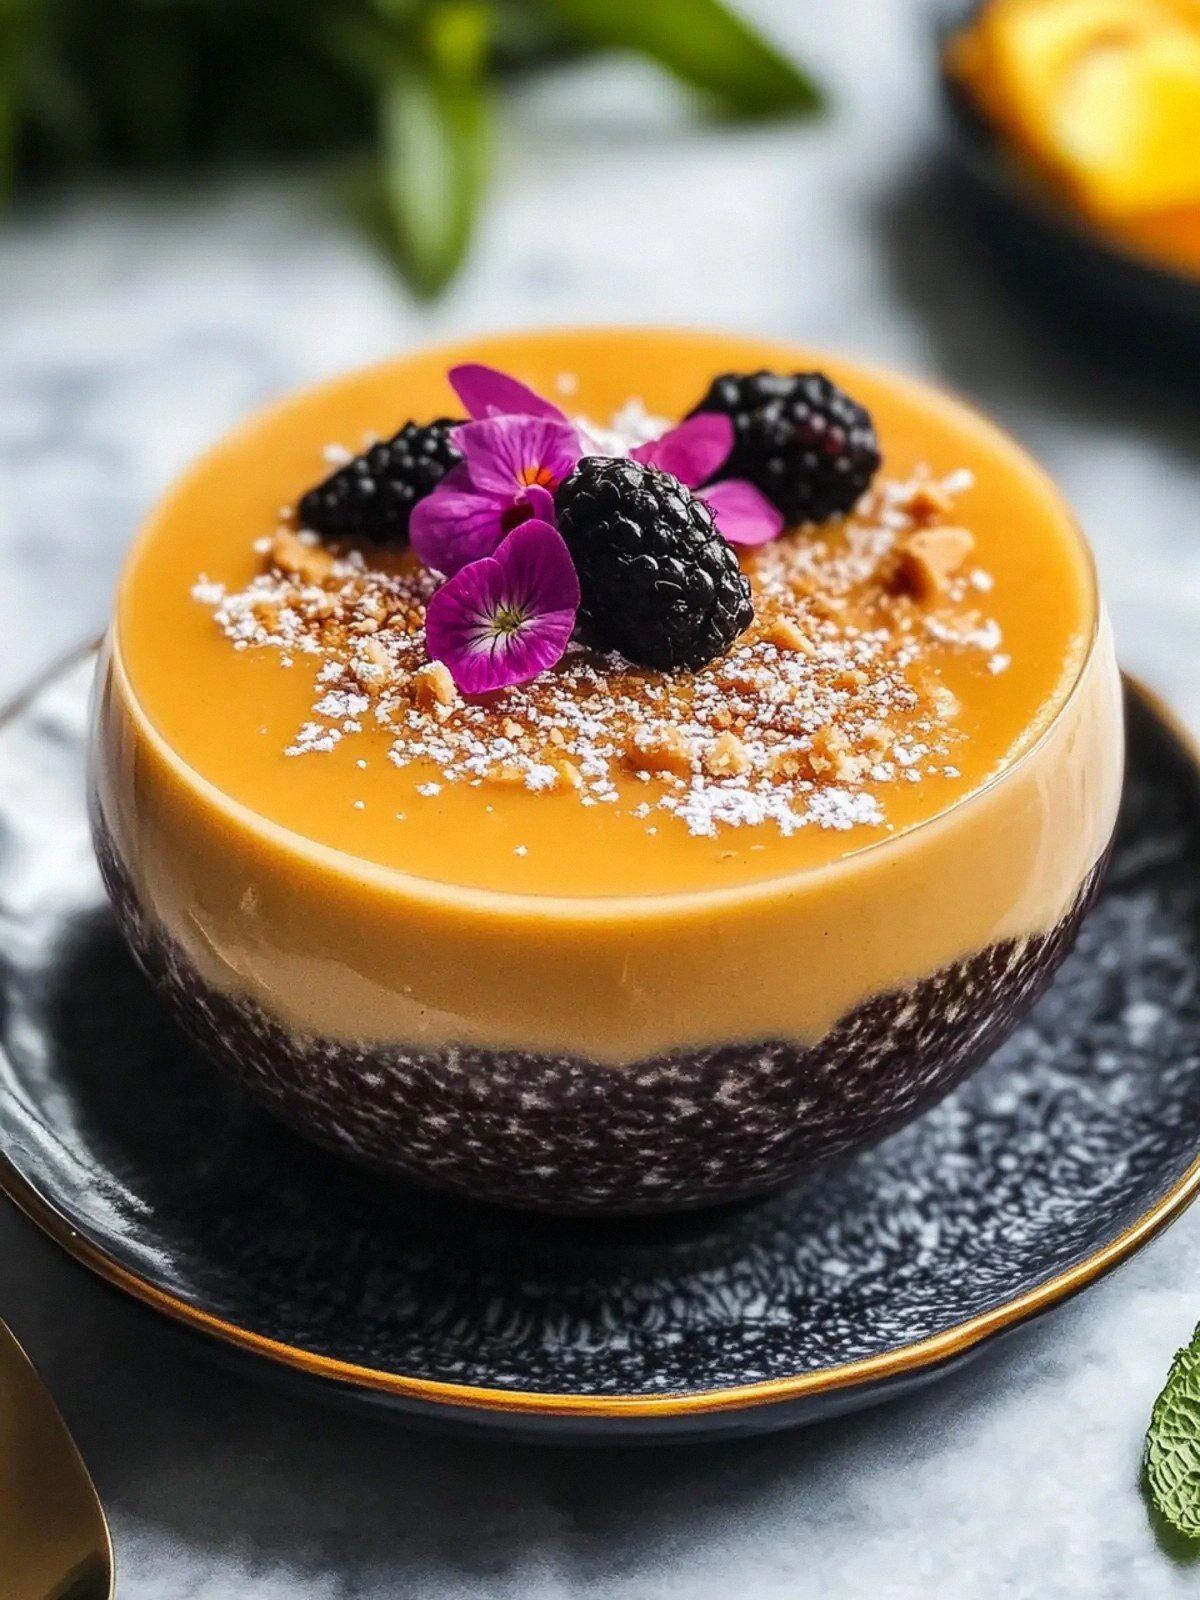
What makes this version stand out is that it’s not just a chocolate pudding; it’s a carefully engineered balance of flavors, textures, and convenience. I’ve swapped out conventional dairy for coconut milk to keep the creamy mouthfeel while staying fully vegan. The use of agar agar provides a firm yet melt‑in‑your‑mouth set, eliminating the need for gelatin. I’ve incorporated a pinch of salt to bring out the chocolate’s depth, and a splash of lemon juice to cut through the sweetness, giving the dessert a bright, refreshing finish. This is hands down the best version you'll ever make at home, and I’ll be honest—I ate half the batch before anyone else got a chance to try it.
Most recipes get this completely wrong by over‑cooking the cocoa or under‑sweetening the coconut, leading to a flat, dry result. Here’s what actually works: a precise ratio of raw cane sugar to coconut milk, a gentle simmer to coax the flavors together, and a final touch of lemon to lift the entire dish. Picture yourself pulling this out of the oven, the whole kitchen smelling incredible, and the first spoon of this decadent vegan flancocho sending your taste buds into a state of bliss. Okay, ready for the game‑changer? Let me walk you through every single step — by the end, you'll wonder how you ever made it any other way.
What Makes This Version Stand Out
- Taste: The combination of raw cane sugar, coconut milk, and a splash of lemon creates a layered sweetness that’s both bold and balanced. The cocoa’s bitterness is amplified, yet never overpowering, giving the dessert a depth that feels like a chocolate bar in liquid form.
- Texture: Agar agar sets the pudding into a silky, firm yet melt‑in‑your‑mouth consistency. The result is a smooth mouthfeel that coats the tongue like velvet, with no graininess or separation.
- Simplicity: Only twelve ingredients, all pantry staples. No specialized equipment beyond a blender or small pot, making it accessible for any cook.
- Uniqueness: The bright citrus note from lemon juice is a surprising twist that cuts through the richness and prevents the dessert from feeling heavy.
- Crowd Reaction: Friends who are skeptical about vegan desserts are left asking for the recipe after the first bite. I’ve seen even the most devoted dairy lovers reach for a second spoon.
- Ingredient Quality: Organic unsweetened coconut milk and raw cane sugar provide the purest flavor profiles, ensuring each component shines without artificial additives.
- Cooking Method: A gentle simmer, precise timing, and the use of agar agar eliminate the need for a double boiler or complex steps.
- Make‑Ahead Potential: The pudding can be prepared up to 24 hours in advance, making it a perfect dessert for dinner parties or last‑minute gatherings.
Alright, let's break down exactly what goes into this masterpiece...
Inside the Ingredient List
The Flavor Base
Raw cane sugar is the backbone of this dessert, providing a natural sweetness that’s less processed than refined sugar. Its subtle molasses undertone enriches the chocolate, giving the pudding a warm, earthy depth. If you skip it, the pudding will taste flat and unremarkable. For a slightly different flavor profile, you can substitute it with coconut sugar, which will add a hint of caramel.
The Texture Crew
Agar agar powder is the secret to achieving that silky, set consistency without the use of gelatin. When heated with liquid, agar creates a gel that holds its shape but dissolves smoothly in your mouth. If you prefer a firmer set, increase the agar to 3 tablespoons; for a softer texture, reduce it to 1 tablespoon. A quick tip: dissolve agar in a small amount of cold water before adding it to the pot to avoid clumping.
The Unexpected Star
Fresh lemon juice is the unsung hero that brightens the entire dessert. It cuts through the richness of coconut and chocolate, leaving a clean finish that lingers pleasantly on the palate. If you don’t have fresh lemons, bottled lemon juice will work, but the flavor may be slightly muted. A pinch of salt also plays a pivotal role, enhancing the chocolate’s depth and balancing the sweetness.
The Final Flourish
All-purpose flour is used here not as a thickener but to absorb excess moisture, ensuring the pudding sets properly. The unsweetened cocoa powder provides the chocolate flavor, and the avocado oil adds a subtle buttery note that smooths the texture. If you’re looking for a gluten-free version, replace the flour with a gluten-free blend of rice flour and cornstarch. The coconut milk—both unsweetened and sweetened condensed—provides the creaminess that makes this dessert feel indulgent.
Everything's prepped? Good. Let's get into the real action...
The Method — Step by Step
- Begin by whisking together 1 cup raw cane sugar, 1 cup unsweetened coconut milk, and 1 cup sweetened condensed coconut milk in a medium saucepan. The mixture should be smooth, with no lumps. Heat over medium heat, stirring constantly, until the sugar dissolves completely. The scent of caramelized sugar will begin to fill the kitchen—absorb it; it’s a sign you’re on the right track.
- Add 2 tablespoons of agar agar powder to the pot. Sprinkle it evenly to avoid clumps, then stir vigorously for about 30 seconds. The mixture will start to thicken; you’ll notice a slight haze forming, which is a good indicator that the agar is activating. Keep the heat at medium and stir continuously to prevent scorching.
- Reduce the heat to low and let the mixture simmer gently for 5 minutes. During this time, the agar fully dissolves, and the flavors meld. If you’re watching the pot, you’ll see a subtle steam rising—this is the pudding beginning to set. Taste a small spoonful; it should be sweet but not cloying.
- Stir in 1 teaspoon of ground cinnamon and 1 teaspoon of pure vanilla extract. The cinnamon adds a warm, spicy undertone that complements the chocolate, while vanilla deepens the overall flavor profile. Mix until the spices are fully incorporated, and the aroma becomes more complex.
- Add the pinch of salt, 1 cup all-purpose flour, and 1/2 cup unsweetened cocoa powder. Whisk until the mixture is smooth and the flour is fully dissolved. The flour may make the mixture slightly thicker, but this is intentional—it helps the pudding set properly once cooled.
- Pour in 1/4 cup avocado oil and 1 cup water, then whisk until the mixture is completely homogeneous. The oil adds a silky mouthfeel, and the water balances the thickness. Let the mixture cook for an additional 3 minutes, stirring occasionally. At this point, the pudding should be thick enough to coat the back of a spoon.
- Finally, fold in 2 tablespoons of fresh lemon juice. The acid will brighten the flavor and help the pudding set with a smooth finish. Give it one last gentle stir, then remove the pot from heat.
- Pour the hot mixture into individual serving dishes or a large bowl. Let it sit for 5 minutes so the surface forms a thin crust. Then, place the dishes in the refrigerator for at least 4 hours, or overnight, to allow the pudding to set fully. The result is a glossy, firm yet melt‑in‑your‑mouth dessert that feels luxurious.
That's it — you did it. But hold on, I've got a few more tricks that'll take this to another level...
Insider Tricks for Flawless Results
The Temperature Rule Nobody Follows
Maintaining a gentle simmer after the agar has dissolved is key. If the temperature rises too high, the gelatinous structure will over‑set, resulting in a rubbery dessert. I keep the heat on low and use a thermometer to ensure the liquid stays below 80°C (176°F). A quick anecdote: a friend once let the mixture boil for an extra minute, and the pudding turned into a dense, unappetizing mass. That lesson taught me the importance of temperature control.
Why Your Nose Knows Best
The aroma of the mixture is a reliable indicator of progress. When the scent of caramelized sugar and cocoa is strong, you’re close to the perfect stage. If the mixture smells too sweet, let it simmer a bit longer to allow some of the sugar to caramelize further. Trust your nose; it’s a seasoned judge of culinary timing.
The 5-Minute Rest That Changes Everything
After pouring the mixture into dishes, let it rest for 5 minutes before refrigerating. This short pause allows the surface to set, creating a thin crust that prevents the pudding from becoming overly watery. It also makes the pudding easier to unmold if you’re using a mold. I’ve found that this tiny step dramatically improves the final texture.
The Lemon Lift
Adding lemon juice at the very end keeps the acidity fresh. If you add it too early, the heat can reduce the brightness, leaving the pudding heavy. The acid also helps the agar set more uniformly, giving the dessert a smoother consistency. A friend once omitted the lemon and the pudding felt flat; the next time I added it, the result was a vibrant, bright finish.
The Chill‑Time Trick
Refrigerating the pudding for at least 4 hours, but preferably overnight, allows the flavors to meld fully. If you’re short on time, a 2‑hour chill still works, but the texture will be slightly looser. The pudding’s firmness is directly tied to how long it sits in the fridge, so plan accordingly.
Creative Twists and Variations
This recipe is a playground. Here are some of my favorite ways to switch things up:
Nutty Crunch
Fold in 1/4 cup toasted almond slivers into the pudding before chilling. The crunch adds texture contrast and a nutty flavor that pairs beautifully with the chocolate base.
Spiced Chili
Add 1/4 teaspoon of smoked chili powder to the cocoa mixture. The smoky heat gives the dessert a subtle kick, making it perfect for those who like a little spice.
Berry Burst
Stir in 1 cup of fresh or frozen mixed berries after the pudding has cooled slightly. The fruit’s tartness balances the sweetness, creating a vibrant, colorful dessert.
Minty Fresh
Incorporate 1 tablespoon of finely chopped fresh mint into the mixture before chilling. The mint adds a refreshing note that lifts the overall flavor profile.
Almond Milk Swap
Replace the unsweetened coconut milk with almond milk for a lighter, nutty base. This variation is great for those who prefer a less coconut-forward flavor.
Coffee Kick
Add 1 tablespoon of instant espresso powder to the cocoa mixture. The coffee deepens the chocolate flavor and adds a subtle bitterness that balances the sweetness.
Storing and Bringing It Back to Life
Fridge Storage
Store the pudding in an airtight container in the refrigerator for up to 5 days. The airtight seal prevents the dessert from absorbing odors from other foods. When you’re ready to serve, let it sit at room temperature for 10 minutes to soften slightly.
Freezer Friendly
The pudding freezes well; place it in a freezer‑safe container, leaving a little headspace for expansion. Freeze for up to 2 weeks. To thaw, transfer it to the refrigerator overnight. Once thawed, give it a quick stir to restore its silky texture.
Best Reheating Method
If the pudding feels too firm, gently warm it in a microwave at 30-second intervals, stirring after each burst. Alternatively, place the container in a saucepan of warm water, ensuring the water level stays below the pudding’s surface. Adding a tiny splash of water before reheating steams the dessert back to perfection, restoring its silky mouthfeel.