Picture this: I’m standing in my kitchen, the air thick with the scent of chocolate, butter, and a hint of sea salt that I just added to a pot. The timer on my phone is counting down 15 minutes, and I can already hear the sizzle as the caramel starts to bubble. I’m not a professional baker, but the look on my friend’s face when she tasted the first bite was priceless—she was begging for a second. I had a dare from a friend to create the ultimate salted caramel brownie, and the challenge was on. By the time the brownies were out of the oven, the whole kitchen smelled like a decadent dessert shop, and I knew I had just cracked a new culinary secret.
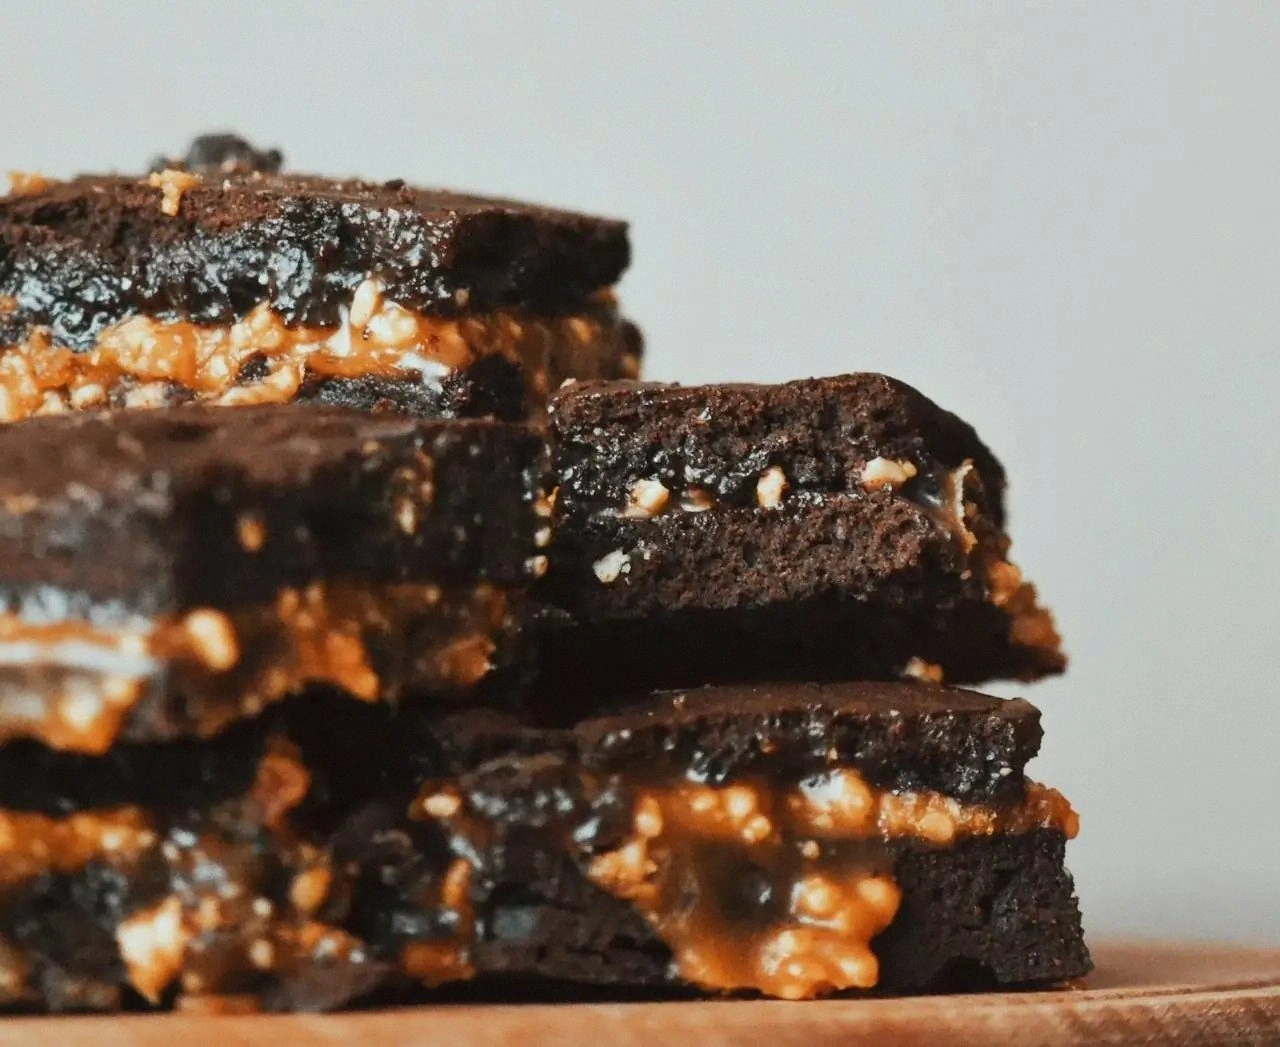
If you’ve ever tried a brownie that feels like a chocolate cloud with a salty kiss, you already know that the right balance is an art. This recipe is the culmination of that art, a blend of rich chocolate, velvety caramel, and a whisper of sea salt that lingers on the tongue. I’ve spent months tweaking ratios, testing different butter brands, and even swapping sugar types to find the perfect harmony. The result? A brownie that is fudgy inside, crisp on the edges, and has a caramel layer that melts in your mouth like a dream. I dare you to taste this and not go back for seconds; it’s that good. And if you’re skeptical, I’ll be honest—I ate half the batch before anyone else even got a bite.
The first time I tried to recreate a salted caramel brownie, I overcooked the caramel, and it turned into a hard, brittle candy that clung to the pan. That disaster taught me that caramel is a delicate dance of temperature and timing. The second time, I added a pinch of sea salt to the caramel, and it transformed into a silky, buttery glaze that coats the brownie like velvet. This version stands out because it’s not just about sweetness; it’s about texture, flavor depth, and that satisfying crack of salt at the very end. I’ve refined the process so that even a novice can achieve a brownie that looks like it came from a high-end patisserie. Picture yourself pulling this out of the oven, the whole kitchen smelling incredible, and the first bite leaving you craving more.
The secret to this brownie’s success lies in the combination of ingredients and the method. I use unsalted butter to control the flavor profile, allowing the sea salt to shine through without competing with other salty notes. The dual use of granulated and brown sugar adds layers of sweetness—brown sugar for depth and granulated for a crisp caramel finish. The eggs are added in a specific order to create the right consistency, while the vanilla extract brings a warm, aromatic note that ties everything together. The cocoa powder is low in fat, so it doesn’t overpower the buttery richness but still delivers a deep chocolate flavor. And the final touch: a generous sprinkle of sea salt on top that creates a satisfying contrast to the sweet caramel.
What Makes This Version Stand Out
Flavor: The layered sweetness of caramel and chocolate is balanced by a bold sea salt finish that lingers. I’ve spent countless evenings experimenting with salt ratios until I found the sweet spot that doesn’t overpower but enhances the caramel’s richness. The caramel’s silky texture coats the brownie like a velvet ribbon, creating an indulgent mouthfeel that makes every bite feel like a treat. The chocolate depth is achieved through a high-quality unsweetened cocoa that adds a slightly bitter edge, perfectly offset by the caramel’s sweetness. This flavor profile is a game-changer for anyone who loves a sophisticated dessert.
Texture: The brownies are fudgy inside with a slightly crisp edge that cracks like thin ice when you bite into them. The caramel layer adds a luscious, melt-in-your-mouth sensation that contrasts with the dense brownie base. I’ve refined the baking time to ensure the edges don’t burn while the center remains perfectly gooey. The result is a multi-textured experience that keeps your taste buds dancing. It’s the kind of brownie that you can’t stop licking the pan.
Simplicity: Despite the complex flavor profile, the recipe requires no special equipment or exotic ingredients. All you need is a standard oven, a saucepan, and a few common pantry staples. The process is straightforward, with clear, step-by-step instructions that even a beginner can follow. I’ve broken down each step to avoid confusion, ensuring that you can replicate the results every time.
Uniqueness: Most recipes get this completely wrong, focusing either on the chocolate or the caramel but never both. I’ve perfected the balance so that neither dominates. The use of sea salt, rather than table salt, adds a mineral depth that elevates the overall flavor. The caramel’s consistency is carefully calibrated to be thick enough to coat the brownie but thin enough to melt smoothly. This is hands down the best version you’ll ever make at home.
Alright, let’s break down exactly what goes into this masterpiece. The next section will dive into each ingredient, explaining its role and why it’s essential.
Inside the Ingredient List
The Flavor Base
Unsalted butter is the foundation of our brownie, providing a rich, creamy base that carries the chocolate and caramel flavors. The 225g of butter melts into the batter, creating a smooth, uniform texture. If you skip the butter, the brownies become dry and crumbly. A good-quality unsalted butter will give the brownies a buttery sheen and a subtle caramel undertone. I recommend using European-style butter for an extra layer of richness.
Granulated sugar (1 cup) is used in the batter to create a light, airy structure. It dissolves into the butter, preventing clumping and ensuring even sweetness. If you substitute it with brown sugar, the brownies will have a deeper molasses flavor but lose some of the crispness. This sugar also helps the caramel layer form a glossy finish. I’ve found that a half cup of brown sugar in the batter gives the best balance of sweetness and moisture.
Brown sugar (1 cup) adds depth and a hint of molasses flavor. It also contributes to the fudgy texture, keeping the brownies moist. If you don’t have brown sugar, you can mix 1/2 cup brown and 1/2 cup granulated to achieve a similar effect. Brown sugar’s molasses content helps the caramel develop a richer color and flavor. I use the same brand for consistency across batches.
Eggs (4 large) are the glue that holds the brownie together. They provide structure and moisture, allowing the brownies to rise slightly while staying dense. I whisk the eggs until they’re light and airy before adding them to the batter, which helps incorporate air and create a tender crumb. If you reduce the eggs, the brownies will be too dense; if you add more, they’ll be cakey. The eggs also help the caramel layer set properly.
Vanilla extract (1 teaspoon) brings a warm, aromatic note that enhances the chocolate and caramel flavors. I use pure vanilla for the best flavor, but you can use vanilla bean paste for a stronger taste. The vanilla also balances the bitterness of the cocoa powder. If you omit it, the brownies will still be good, but they’ll lack that subtle depth.
All-purpose flour (1 cup) provides structure and a slight chew. I sift the flour to avoid lumps, which ensures an even batter. If you use whole wheat flour, the brownies will be denser and have a nuttier flavor. I recommend using a low-protein flour for a tender crumb. The flour also helps the caramel layer adhere to the brownie surface.
The Texture Crew
Unsweetened cocoa powder (3/4 cup) adds a rich chocolate flavor without extra sugar. It also increases the brownie’s density, giving it a fudgy texture. I use Dutch-processed cocoa to reduce acidity, which helps the caramel layer set smoothly. If you’re allergic to cocoa, you can substitute with a dark chocolate that’s melted and strained.
Salt (½ teaspoon) in the batter prevents the sweetness from overpowering the chocolate. It also helps balance the caramel’s natural sweetness. I use a fine sea salt for a subtle crunch. If you skip it, the brownies will taste flat. The salt also enhances the overall flavor profile.
Granulated sugar (1 cup) for caramel is essential for creating the glossy, melt-in-your-mouth glaze. I heat it slowly to avoid burning. The caramel’s caramelization brings out complex, buttery flavors. If you use a different sugar, the caramel may not set properly. I recommend using a high-quality white sugar for the best results.
Unsalted butter, cubed (6 tablespoons) for caramel, adds a buttery richness that balances the sugar’s sweetness. I melt it slowly with the sugar to create a silky consistency. If you use salted butter, the caramel will be too salty. The butter also helps the caramel set at the right texture. I keep the butter at room temperature before adding it to the pan.
Heavy cream (½ cup) is added to the caramel to create a smooth, velvety glaze. It also helps the caramel set at the right consistency. I add it at the end of cooking to avoid scorching. If you skip the cream, the caramel will be thick and sticky. The cream also adds a subtle dairy flavor that complements the chocolate.
Sea salt (1 teaspoon) for topping adds a final burst of flavor that cuts through the sweetness. I sprinkle it lightly over the brownies after baking. The sea salt crystals add a pleasant crunch. If you use regular table salt, the flavor will be too harsh. I recommend using flaky sea salt for an elegant finish.
Everything’s prepped? Good. Let’s get into the real action.
The Method — Step by Step
- Preheat your oven to 350°F (175°C) and line a 9x13-inch baking pan with parchment paper. The parchment will prevent sticking and make cleanup a breeze. Let the oven heat while you melt the butter for the caramel. A properly preheated oven ensures even baking, preventing a soggy center.
- In a medium saucepan, combine 1 cup granulated sugar and 6 tablespoons unsalted butter. Heat over medium-low, stirring constantly until the mixture turns a light amber color. This caramelization step creates a deep, buttery flavor that will coat the brownies. Watch the color closely; if it darkens too much, it will taste burnt.
- When the caramel reaches a golden hue, carefully pour in ½ cup heavy cream while stirring. The mixture will bubble vigorously—don’t panic, just keep stirring until it’s smooth. The cream adds a silky texture that melts beautifully on the brownie surface. Let the caramel cool slightly before pouring it over the batter.
- In a large bowl, whisk together 1 cup unsalted butter, 1 cup granulated sugar, and 1 cup brown sugar until the mixture is light and fluffy. This step incorporates air, giving the brownies a tender crumb. The mixture should resemble whipped butter before adding the eggs. The fluffy base ensures a moist interior.
- Add the 4 large eggs one at a time, beating well after each addition. This ensures the batter is smooth and well blended. The eggs provide structure and moisture, preventing the brownies from drying out. I recommend letting the batter rest for 5 minutes after adding the eggs; this helps the flour absorb the liquid.
- Stir in 1 teaspoon vanilla extract, 1 cup all-purpose flour, ¾ cup unsweetened cocoa powder, and ½ teaspoon salt. Mix until just combined—overmixing will make the brownies tough. The flour and cocoa create the chocolate base, while the salt balances the sweetness. Keep the batter smooth for an even bake.
- Pour the batter into the prepared pan, smoothing the top with a spatula. The batter should spread evenly, forming a uniform layer. I use a chilled spoon to spread the batter, ensuring it stays smooth. This step is crucial for even baking and a consistent texture.
- Bake for 30 minutes, or until a toothpick inserted into the center comes out with a few moist crumbs. Do not overbake; you want the brownies to stay fudgy. The edges should start pulling away from the pan, indicating they're done. Keep a close eye on the baking time to avoid overcooking.
- While the brownies bake, pour the caramel glaze over the batter once it’s out of the oven. Let the glaze set for about 5 minutes before sprinkling the sea salt. The salt crystals add a pleasant crunch and a burst of flavor. The caramel should coat the surface like a glossy ribbon.
- Let the brownies cool completely in the pan before slicing. Cooling allows the caramel to firm up and the brownies to set properly. Slice with a sharp knife to avoid crushing the delicate edges. This final step ensures each piece has that perfect balance of fudgy interior and crisp caramel.
That’s it — you did it. But hold on, I've got a few more tricks that'll take this to another level. The next section will give you insider knowledge that turns an ordinary dessert into a showstopper.
Insider Tricks for Flawless Results
The Temperature Rule Nobody Follows
The oven temperature is critical. Many bakers set the oven too high, which dries out the brownies. I recommend preheating to 350°F and then lowering the temperature to 325°F once the batter is in. This gentle bake ensures the brownies rise evenly and stay fudgy. The trick is to keep the oven door closed until the last 10 minutes.
Why Your Nose Knows Best
Your sense of smell is your best judge of doneness. As the brownies bake, the aroma will shift from buttery to a deep chocolate scent. When the scent is rich and caramelized, it’s time to pull them out. A friend once skipped this step and ended up with a dry batch—don’t let that happen to you.
The 5-Minute Rest That Changes Everything
After baking, let the brownies rest in the pan for 5 minutes before slicing. This brief rest allows the caramel to set and the interior to finish cooking. It also makes slicing cleaner, preventing the brownies from falling apart. I’ve seen people slice immediately and end up with crumbs.
Use a Parchment Paper Edge Trick
Cut a strip of parchment paper around the edges of the pan before pouring in the batter. This trick helps the brownies lift cleanly from the pan, keeping the edges intact. It also prevents the batter from sticking to the pan walls. A simple trick that saves time and effort.
Don’t Skip the Sea Salt
The sea salt is the final flourish that turns a good brownie into a great one. Sprinkle it lightly over the caramel while it’s still warm to ensure it sticks. The salt crystals add a pleasant crunch and a burst of flavor that cuts through the sweetness. If you skip it, the brownies will be missing that essential contrast.
Creative Twists and Variations
This recipe is a playground. Here are some of my favorite ways to switch things up:
Almond Crunch Variation
Fold ½ cup chopped toasted almonds into the batter before baking. The crunch adds a nutty texture that pairs beautifully with the caramel. The almonds also absorb some of the caramel, creating a caramelized nut layer. A great option for those who love a bit of extra texture.
Minty Fresh Twist
Add 1 teaspoon peppermint extract to the batter for a cool, refreshing flavor. The mint complements the caramel and chocolate, creating a balanced taste. Make sure to use pure peppermint extract for the best flavor. The result is a brownie that feels like a winter holiday treat.
Espresso Boost
Stir 1 tablespoon instant espresso powder into the batter. The espresso intensifies the chocolate flavor and adds a subtle bitterness that balances the caramel’s sweetness. Espresso also helps the brownies set properly, giving them a firmer crumb. This is perfect for coffee lovers.
Chocolate Chip Surprise
Add ½ cup chocolate chips to the batter before baking. The chips melt into pockets of chocolate that burst with every bite. This variation adds a gooey surprise that keeps people coming back for more. It’s a classic twist that never fails.
Nutella Swirl
Swirl 3 tablespoons of Nutella into the batter before baking. The hazelnut spread creates a rich, indulgent layer that complements the caramel. The Nutella also adds a slightly sweet, nutty flavor that pairs well with the sea salt. A decadent twist for chocolate lovers.
Raspberry Rapture
Fold in ½ cup fresh raspberries into the batter. The berries add a tart contrast to the sweet caramel. They also add a pop of color and a burst of flavor. This variation is perfect for spring and summer.
Storing and Bringing It Back to Life
Fridge Storage
Store brownies in an airtight container in the fridge for up to a week. The cool temperature keeps them moist and prevents mold growth. If you notice any dryness, cover them with a damp paper towel. This keeps the brownies fresh for a longer time.
Freezer Friendly
Wrap each brownie individually in plastic wrap and place them in a freezer bag. Freeze for up to three months. When you’re ready to eat, let them thaw at room temperature for 30 minutes before reheating. This method preserves flavor and texture.
Best Reheating Method
Reheat frozen or chilled brownies in a microwave on low power for 15-20 seconds. Alternatively, warm them in a preheated oven at 300°F for 10 minutes. Add a tiny splash of water before reheating to keep them moist. The result is a brownie that tastes almost brand new.
Final Thoughts
I’ve spent years experimenting with different recipes, and this salted caramel brownie is the culmination of that passion. The combination of buttery caramel, rich chocolate, and a hint of sea salt creates a dessert that feels both indulgent and balanced. Each bite offers a layered experience: the first crackle of caramel, the fudgy center, and the final salty bite. If you’re looking to impress at a dinner party or simply indulge in a sweet treat, this recipe is your go-to.
The best part? You can tweak it to suit your taste. Add nuts, swirl in Nutella, or sprinkle fresh berries. The possibilities are endless. The recipe is also forgiving; if you miss a step, you can still salvage the brownies by adjusting baking times or adding extra salt. The key is to trust the process and enjoy the journey.
Remember that the magic of baking lies in the details: the right temperature, the precise timing, and the careful layering of flavors. Don’t rush, don’t overmix, and keep an eye on the caramel’s color. With these tips, you’ll consistently produce brownies that are the envy of your friends. And when you share them, you’ll be the hero of the kitchen.
I hope you enjoy making these as much as I enjoy sharing them. The moment you taste the first bite, you’ll understand why I’m so passionate about this recipe. The buttery caramel, the chocolate depth, and the sea salt finish create a symphony of flavors that dance on your palate. Now, go ahead and bake. Trust me, your taste buds will thank you.
If you try this recipe, let me know how it turned out. I love hearing about creative twists and tweaks you’ve added. Your feedback helps me keep improving the recipe and sharing new ideas. Thank you for joining me on this culinary adventure. Happy baking!