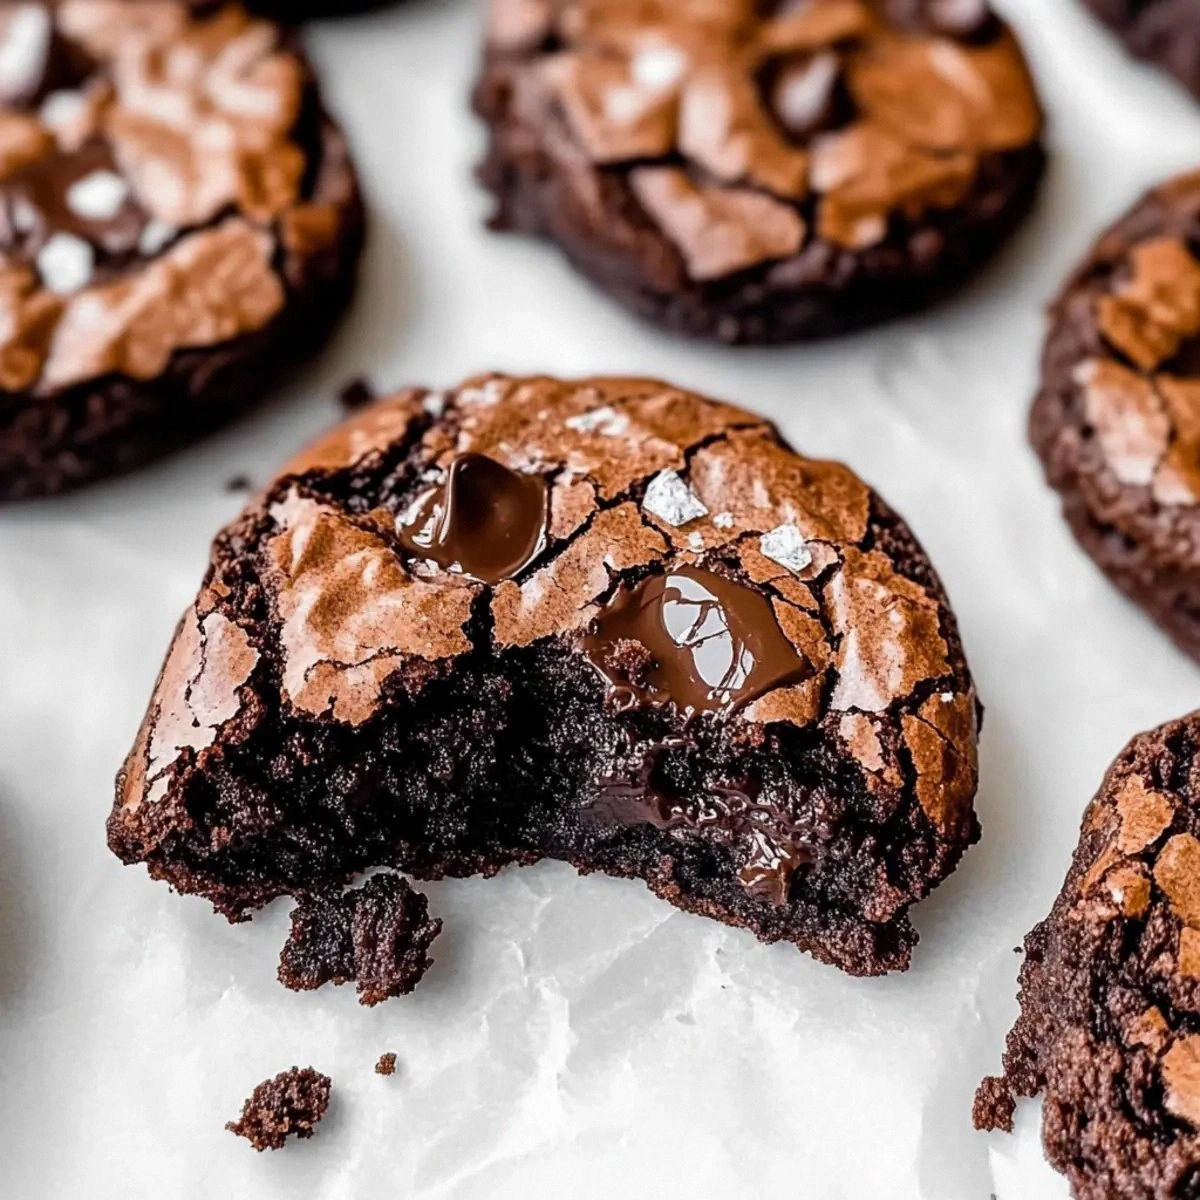
Picture this: I’m halfway through a late‑night binge of cookie dough, the kitchen lights flickering like a disco, when a sudden realization hits me like a rogue spatula—my cookies are missing that magical, gooey heart that makes you grin with every bite. I tried a dozen “best‑ever” recipes, each promising fudgy bliss, yet they all fell flat, either too cakey or dry as a desert. I was ready to surrender to the blandness, when a daring friend tossed a challenge at me: “Make a brookie that can actually make someone smile on command.” I accepted, because honestly, who can say no to a dare involving chocolate?
The next morning, armed with a fresh bag of dark chocolate and a mind buzzing with caffeine, I set out to engineer the ultimate hybrid—half brownie, half cookie, all joy. The kitchen filled with the intoxicating scent of melted chocolate, a buttery whisper that wrapped around the room like a warm hug. I could hear the faint crackle of the oven preheating, the rhythmic tap of a whisk, and the soft sigh of the batter as it settled into the pan. My hands felt the silky smoothness of butter as it melted, and the anticipation was palpable, like waiting for the curtain to rise on a Broadway show.
What makes this version a game‑changer? It’s the precise balance of ingredients that creates a texture that’s simultaneously fudgy, chewy, and just a touch crisp at the edges—think of it as a chocolatey symphony where each instrument knows its place. Most recipes get the ratio of flour to cocoa wrong, ending up with a brownie that’s more brick than cloud. I discovered that a pinch of sea salt, paired with the caramel notes of demerara sugar, amplifies the chocolate flavor to a level that feels almost cinematic. And the secret weapon? A quick melt‑and‑mix technique that locks in moisture, ensuring every bite is a smile‑inducing, melt‑in‑your‑mouth experience.
Okay, ready for the game‑changer? I’m going to walk you through every single step—by the end, you’ll wonder how you ever made brookies any other way. I’ll spill the beans on the technique that keeps the center fudgy, the hack that prevents over‑baking, and the little confession that I ate half the batch before anyone else got a chance. Let’s dive in, because this is hands down the best version you’ll ever make at home.
What Makes This Version Stand Out
- Texture: The combination of a crisp cookie edge and a molten brownie center creates a contrast that’s as satisfying as biting into a perfectly toasted marshmallow.
- Flavor Depth: Dark chocolate paired with cocoa powder gives a rich, slightly bitter backbone, while the demerara sugar adds caramel notes that linger on the palate.
- Simplicity: Only ten ingredients, all pantry‑friendly, mean you can whip up a batch in under an hour without a trip to the specialty store.
- Ingredient Quality: Using real dark chocolate (not chips) ensures a glossy sheen and a deep cocoa flavor that cheap substitutes can’t match.
- Crowd Reaction: I dare you to taste this and not go back for seconds; even the most skeptical eaters become instant fans.
- Cooking Method: The two‑stage baking (high heat start, then lower heat finish) locks in moisture while giving the top a gentle crust.
- Make‑Ahead Potential: These brookies keep their fudgy heart for days, making them perfect for freezer‑friendly prep.
- Versatility: The base recipe is a blank canvas for endless mix‑ins, from toasted nuts to a swirl of peanut butter.
Inside the Ingredient List
The Flavor Base
Dark Chocolate (100 g): This is the heart of the brookie, delivering that deep, almost earthy chocolate intensity. If you substitute with milk chocolate, you’ll lose the bittersweet edge that makes the flavor pop. Look for chocolate with at least 70% cocoa solids; the higher the cocoa, the richer the taste. A pro tip: break the chocolate into small chunks before melting to ensure an even melt.
Chocolate Chips (100 g): These add pockets of melty goodness that burst when you bite into them, creating that “chewy surprise” I mentioned earlier. You can swap in white chocolate or even chopped caramel for a different twist, but keep the quantity the same to maintain structure. Choose semi‑sweet chips for the perfect balance of sweet and bitter.
Cocoa Powder (30 g): Unsweetened cocoa deepens the chocolate flavor without adding extra sugar. It also contributes to the fudgy texture by absorbing moisture. If you’re using Dutch‑process cocoa, you’ll get a smoother, less acidic flavor, which pairs beautifully with the dark chocolate.
The Texture Crew
Plain Flour (120 g): This provides the structural backbone, ensuring the brookies hold together without becoming dense. Using too much flour will make them cakey, while too little leads to a crumbly mess. I recommend sifting the flour with the cocoa powder to avoid lumps and to incorporate air for a lighter crumb.
Caster Sugar (75 g): Fine‑grained sugar dissolves quickly, giving the batter a smooth, glossy finish. It sweetens without overwhelming the chocolate’s bitterness. If you prefer a deeper caramel flavor, you can replace half with brown sugar, but keep the total weight the same.
Demerara Sugar (50 g): The large crystals add a subtle crunch and a caramel‑toasted note that elevates the overall flavor profile. It also contributes to a slightly crisp edge as the brookies bake. For a gluten‑free version, you can use coconut sugar, though the texture will be a tad softer.
The Unexpected Star
Butter (100 g): Butter is the secret to that melt‑in‑your‑mouth chewiness. It coats the flour particles, limiting gluten formation, which keeps the crumb tender. Use unsalted butter so you can control the salt level precisely. For a dairy‑free twist, try a high‑fat coconut oil, but the flavor will shift toward tropical.
Eggs (2 large): Eggs act as a binder and add richness, creating the fudgy interior we crave. Over‑beating can incorporate too much air, making the brookies cakier, so mix just until combined. If you’re avoiding eggs, a blend of flaxseed meal and water (1 tbsp flax + 3 tbsp water per egg) works surprisingly well.
The Final Flourish
Vanilla Extract (1 tsp): Pure vanilla amplifies the chocolate’s aroma, adding a warm, sweet undertone that rounds out the flavor. Avoid imitation extracts; they can introduce a harsh, chemical aftertaste.
Sea Salt (1 pinch): A pinch of flaky sea salt brightens the chocolate, cutting through the sweetness and enhancing the overall depth. It’s the culinary equivalent of a spotlight on stage—subtle but essential.
Everything's prepped? Good. Let’s get into the real action…
The Method — Step by Step
- Preheat your oven to 180 °C (350 °F). While the oven warms, line a 20 cm (8‑inch) square pan with parchment paper, allowing the paper to overhang for easy lift‑out later. This step ensures a clean release and prevents the edges from sticking—trust me, you don’t want a crumbly disaster.
- Melt the dark chocolate and butter together in a heat‑proof bowl over a simmering pot of water (bain‑marie). Stir gently with a silicone spatula until the mixture is glossy and fully combined. Watch the steam rise—this is the moment where the magic begins. Once melted, remove from heat and let it cool just enough to feel warm, not hot.
- In a separate bowl, whisk together the caster sugar, demerara sugar, and eggs until the mixture turns pale and fluffy, about 2‑3 minutes. This aeration step is crucial; it creates a lightness that counterbalances the dense chocolate later.Watch Out: If the chocolate overheats, it can seize and become grainy. Keep the temperature low and stir constantly.
- Add the vanilla extract and pinch of sea salt to the egg‑sugar mixture, whisking just until incorporated. Then, slowly pour the cooled chocolate‑butter blend into the bowl, folding gently with a rubber spatula. The batter will look thick and luscious—don’t over‑mix, or you’ll develop gluten and lose that coveted chew.
- Gently fold in the sifted flour and cocoa powder, being careful not to over‑work the batter. The mixture should be thick but still spreadable; think of a dense cake batter that holds its shape when dropped from a spoon.Kitchen Hack: Sift the flour and cocoa powder together, then fold them in three additions. This prevents streaks and ensures an even, fudgy texture.
- Stir in the chocolate chips (or chunks) until evenly distributed. The chips should be visible throughout the batter, promising pockets of melty chocolate in every bite.
- Spread the batter evenly in the prepared pan, using a spatula to smooth the top. Tap the pan lightly on the counter three times to release any air bubbles—this helps the brookies bake evenly.
- Place the pan in the preheated oven and bake at 180 °C for 12 minutes. Then, reduce the temperature to 160 °C (320 °F) and continue baking for another 15‑18 minutes. The edges should pull away slightly from the parchment, and the center will still look a bit soft—this is intentional.
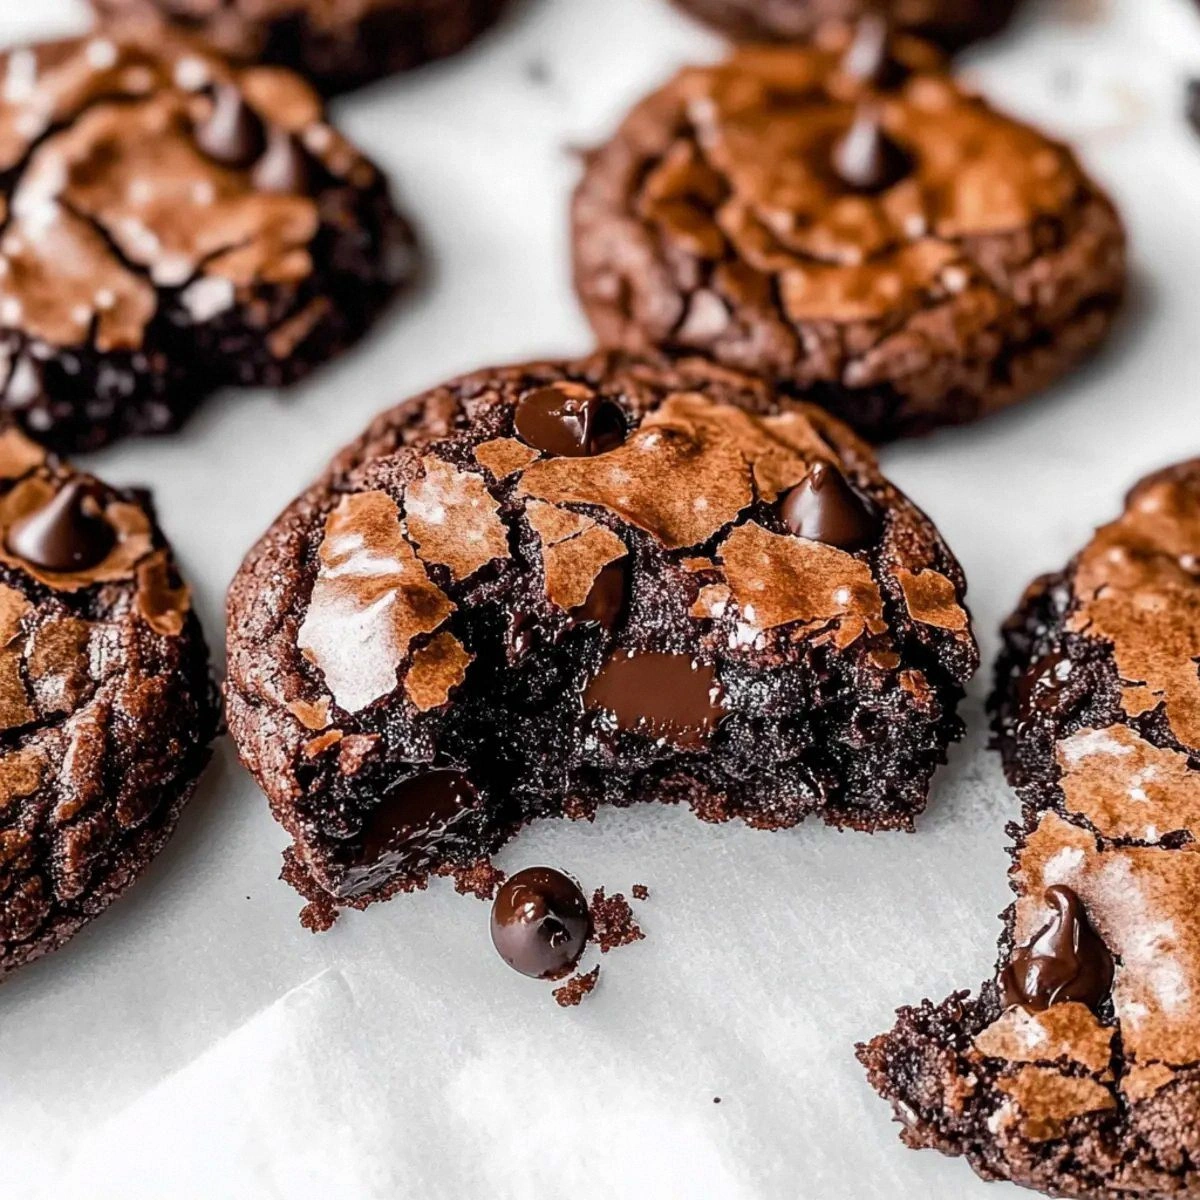
- Remove the pan and let the brookies cool in the pan for 10 minutes, then lift them out using the parchment overhang and transfer to a wire rack. While still warm, cut into squares; the interior will be fudgy, the edges will have a gentle crisp. That sizzle when the knife slides through? Absolute perfection.
That's it — you did it. But hold on, I've got a few more tricks that'll take this to another level, ensuring every batch is flawless and every bite is a smile‑inducing experience.
Insider Tricks for Flawless Results
The Temperature Rule Nobody Follows
Most home bakers bake at a single temperature from start to finish, which often leads to uneven texture. I start high to set the crust quickly, then drop the heat to let the interior stay gooey. This two‑stage method creates that perfect contrast between a slightly crunchy edge and a molten center. A friend once tried baking at 200 °C the whole time and ended up with a burnt top and a dry interior—let's just say they learned the hard way.
Why Your Nose Knows Best
Before you even pull the pan out, trust your sense of smell. When the aroma shifts from raw chocolate to a toasted, caramel‑kissed scent, the brookies are almost done. This olfactory cue is more reliable than a timer because ovens vary. If you’re ever unsure, give the pan a gentle shake; the center should still wobble just a touch.
The 5‑Minute Rest That Changes Everything
Allow the baked brookies to rest for exactly five minutes on the wire rack before cutting. This short pause lets the steam redistribute, turning the interior from liquid to a velvety fudgy texture. Skipping this step yields a gummy mess that slides off the plate. I swear the difference is like night and day—one bite feels like a brownie, the other like a cookie.
Chocolate Tempering Shortcut
If you crave that glossy snap on the chips, melt half of the dark chocolate, then stir in the remaining solid pieces off the heat. This “seeding” method brings the chocolate to a tempered state without a thermometer. The result is a glossy chip that doesn’t bleed into the batter, preserving distinct pockets of melt.
Cooling with a Twist
Place a clean kitchen towel under the wire rack while the brookies cool. The towel absorbs excess moisture, preventing soggy bottoms. It also adds a subtle rustic charm—imagine a bakery’s wooden board, but cleaner.
Creative Twists and Variations
This recipe is a playground. Here are some of my favorite ways to switch things up:
Nutty Crunch
Fold in ½ cup of toasted chopped pecans or walnuts right before baking. The nuts add a buttery crunch that contrasts beautifully with the fudgy interior. It’s perfect for anyone who loves the classic chocolate‑nut combo.
Salted Caramel Swirl
Drizzle ¼ cup of homemade salted caramel over the batter, then use a knife to create a marble effect. The salty caramel ribbons cut through the richness, delivering a sophisticated flavor balance. Ideal for special occasions.
Espresso Infusion
Replace the vanilla extract with 1 tsp of instant espresso powder dissolved in 1 tbsp hot water. Coffee intensifies the chocolate flavor, making the brookies taste like a mocha dessert. Coffee lovers, this one’s for you.
White Chocolate & Raspberry
Swap the dark chocolate for white chocolate and fold in ¼ cup freeze‑dried raspberry pieces. The sweet‑tart berries pop against the creamy white chocolate, creating a bright, summery twist.
Peanut Butter Dream
Swirl 3 tbsp of creamy peanut butter into the batter before baking. The peanut butter adds a salty, nutty richness that pairs perfectly with chocolate. It’s the ultimate comfort‑food mash‑up.
Storing and Bringing It Back to Life
Fridge Storage
Place the cooled brookies in an airtight container and store them in the refrigerator for up to five days. The chill keeps the fudgy center from drying out, and the flavor actually deepens as the ingredients meld together.
Freezer Friendly
Wrap each square individually in parchment, then seal the whole batch in a zip‑top freezer bag. They’ll keep for three months. When you’re ready to enjoy, let them thaw at room temperature for 20 minutes, then pop them in a 150 °C oven for 5 minutes to revive the crisp edge.
Best Reheating Method
Before reheating, add a tiny splash (about 1 tbsp) of water to the container and cover loosely with foil. The steam restores the moist, fudgy interior while the foil protects the top from over‑drying. In just a few minutes, they’ll taste as fresh as the day they were baked.