I still remember the day my yeast packet betrayed me. There I was, standing in my tiny apartment kitchen at 2 AM, flour dust floating like snow in the harsh overhead light, stomach growling louder than the traffic outside. My roommate had challenged me to make sandwich bread from scratch, and I'd accepted with the confidence of someone who'd never actually baked bread before. The yeast sat there in its little envelope, taunting me with expiration dates and complicated proofing instructions that might as well have been written in ancient hieroglyphics. That's when I made a decision that would change my bread-baking life forever: I was going to make sandwich bread without yeast, and it was going to be spectacular.
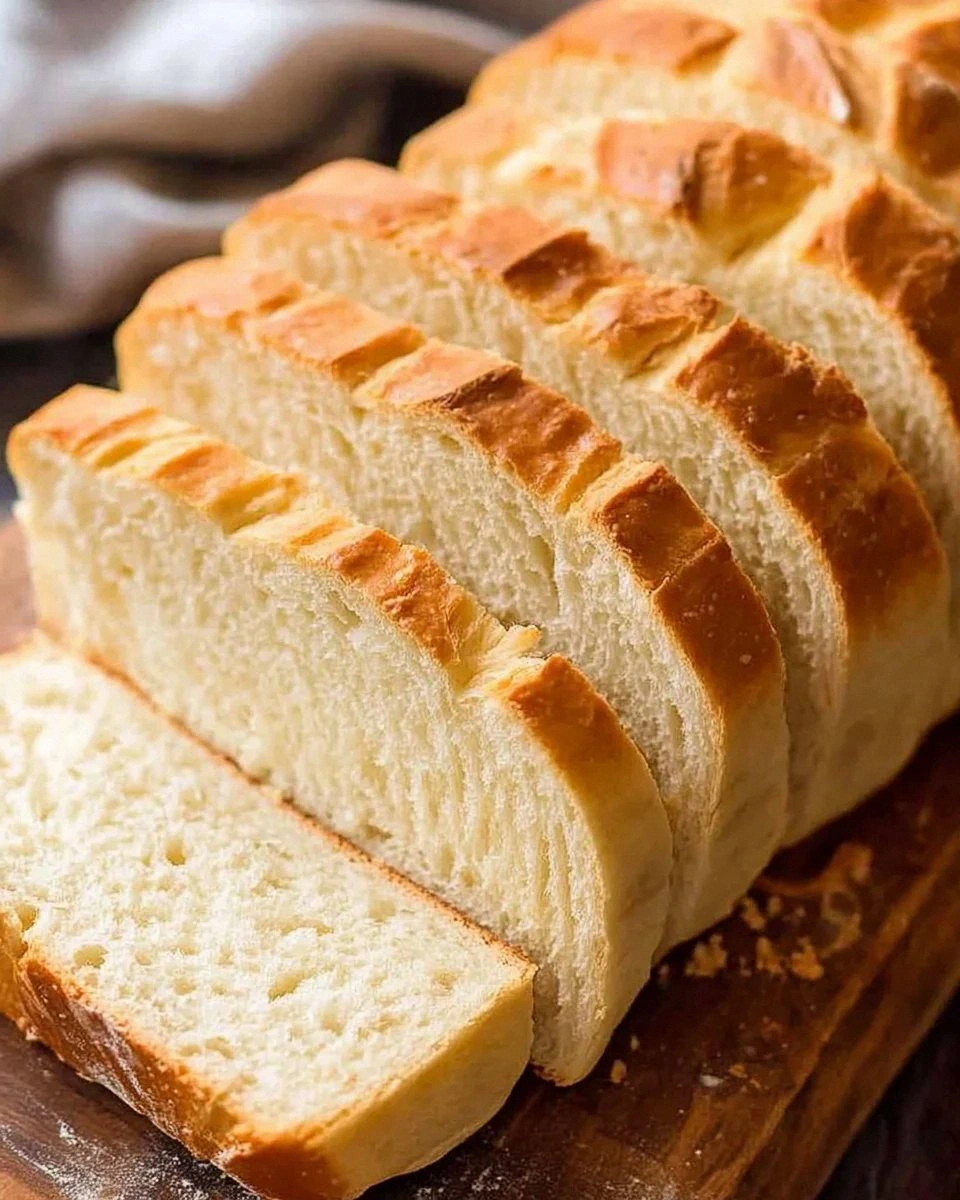
Fast forward through three failed attempts that could have doubled as paperweights, and I finally cracked the code. This isn't just any bread recipe — this is the bread that made my skeptical roommate eat her words along with three slices slathered in butter. The crust shatters like thin ice under your fingers, revealing a crumb so soft and tender it makes store-bought bread feel like chewing on a kitchen sponge. The aroma that fills your kitchen is nothing short of magical, a warm hug of homemade goodness that drifts through every room and has neighbors knocking on doors asking what you're making.
What makes this recipe absolutely revolutionary is how it achieves that perfect sandwich bread texture without any yeast whatsoever. We're talking about a bread that rises like it's been touched by culinary magic, slices cleanly without crumbling, and toasts to golden perfection. The secret lies in a combination of baking powder and baking soda working in perfect harmony, creating bubbles that make the bread rise like it's got yeast-powered dreams. Picture yourself pulling this out of the oven, the whole kitchen smelling incredible, steam rising as you slice into the warm loaf, butter melting into every tender cranny.
Let me walk you through every single step — by the end, you'll wonder how you ever made it any other way. We're going to explore the science behind why this works, the ingredients that make it foolproof, and the techniques that'll have you turning out professional-quality sandwich bread faster than you can say "no yeast needed." Trust me, once you master this recipe, you'll never be held hostage by yeast packets again.
What Makes This Version Stand Out
This is hands down the best version you'll ever make at home, and I'm not just saying that because I'm biased from eating half the batch before anyone else got to try it. The texture defies logic — it's somehow both dense enough to hold your sandwich fillings without collapsing and light enough that you won't mistake it for a brick. Most recipes get this completely wrong by either creating something too cake-like or producing a loaf that could substitute for a doorstop. Here's what sets this apart from every other yeast-free bread recipe floating around the internet:
- Lightning Fast: From mixing bowl to finished loaf in under an hour, because who has time to wait for yeast to do its thing when sandwich cravings strike hard and fast?
- Foolproof Texture: The combination of chemical leaveners creates a crumb structure that's perfectly uniform with tiny air pockets that give you that authentic sandwich bread experience.
- Pantry Staple Ingredients: Everything you need is probably sitting in your kitchen right now, no specialty store runs required for obscure ingredients you'll use once.
- Versatile Base: This bread plays well with additions — throw in herbs, cheese, or even a handful of seeds without compromising the rise or structure.
- Kid-Approved: My neighbor's picky eight-year-old, who normally treats vegetables like they're radioactive, devoured four slices of this bread plain. That's the ultimate endorsement.
- Make-Ahead Magic: Bakes up beautifully, slices like a dream when completely cool, and stays fresh for days in proper storage.
- Beginner-Friendly: No kneading, no proofing, no wondering if your yeast is alive or just pretending to be while plotting your culinary demise.
Alright, let's break down exactly what goes into this masterpiece, because understanding your ingredients is half the battle in creating bread that'll make you the hero of every picnic and lunchbox in your household.
Inside the Ingredient List
Understanding what each component brings to the party transforms you from someone who follows recipes blindly into a confident baker who can troubleshoot on the fly. Every ingredient in this recipe was chosen for specific reasons, tested through dozens of trials where I learned exactly what happens when you try to cut corners or make substitutions that seem harmless but end in disappointment.
The Foundation Builders
All-purpose flour forms the backbone of our bread, providing the gluten structure that gives us that familiar sandwich bread chew. Don't be tempted to swap in whole wheat flour unless you're prepared for a denser, more rustic loaf — the bran particles in whole wheat actually cut through gluten strands like tiny knives. If you absolutely must use whole wheat, start by replacing only half the all-purpose flour and increase the liquid by two tablespoons to compensate for the extra absorption.
Baking powder and baking soda are the dynamic duo responsible for our rise, working together like a perfectly choreographed dance routine. The baking powder provides immediate lift when it hits the liquid, while baking soda waits for the acidic buttermilk to activate it, creating a second rise during baking. Skip either one and your bread will resemble a thick pancake more than sandwich bread, edible but disappointing.
The Flavor Enhancers
Salt isn't just a flavor booster here — it actually strengthens the gluten network and controls yeast activity (not that we have any, but it's a baking fundamental). I dare you to taste this and not go back for seconds when it's properly seasoned. Use fine sea salt if you have it; it distributes more evenly throughout the dough than coarse kosher salt.
Honey adds subtle sweetness and helps with browning, creating that gorgeous golden crust that makes your kitchen smell like a professional bakery. If you've ever struggled with bread that emerges from the oven pale and anemic, honey is your secret weapon. Maple syrup works as a substitute, but honey's viscosity helps retain moisture better.
The Texture Magicians
Buttermilk is the unsung hero here, providing acidity to activate the baking soda while adding richness and tenderness to the crumb. No buttermilk? No problem — add one tablespoon of lemon juice or white vinegar to regular milk and let it sit for five minutes until it curdles slightly. Future pacing moment: Picture yourself pulling this out of the oven, the whole kitchen smelling incredible, knowing you created this masterpiece with kitchen chemistry.
Melted butter gives us richness and helps create that tender crumb that makes store-bought bread feel like cardboard in comparison. Oil works in a pinch, but butter's flavor is irreplaceable. Use unsalted butter so you can control the salt level precisely.
The Method — Step by Step
Okay, ready for the game-changer? This method is so straightforward you'll wonder why anyone bothers with yeast at all. The key is treating your ingredients with respect and understanding the timing, because chemical leaveners wait for no one — once they hit liquid, the clock starts ticking.
- Preheat your oven to 375°F (190°C) and position the rack in the center. This isn't just busy work — a properly heated oven ensures your bread starts rising immediately rather than sitting there like a sad lump while the oven catches up. Grease a 9x5-inch loaf pan with butter, making sure to get into all the corners where bread likes to stick like it's glued in place.
- Whisk together the flour, baking powder, baking soda, and salt in a large bowl. This step seems basic, but it's crucial — those little pockets of leavening need to be evenly distributed or you'll end up with a loaf that's half brick, half air bubble. The mixture should look uniformly pale and fluffy, like fresh snow that's been lightly disturbed.
- In a separate bowl, combine the buttermilk, honey, and melted butter. The butter should be cooled to lukewarm — hot butter will start cooking the flour when you combine them, creating a gluey mess that no amount of mixing will fix. Stir until the honey dissolves completely, creating a smooth, cohesive liquid that smells like comfort itself.
- Make a well in the center of your dry ingredients and pour in the wet mixture. Using a wooden spoon or rubber spatula, fold the ingredients together with gentle strokes, stopping as soon as no dry flour remains. Overmixing develops gluten and creates tough bread — we're looking for a shaggy dough that looks like it can't possibly become bread, but trust the process.
- Transfer the dough to your prepared pan, spreading it evenly with a spatula. Don't press down too firmly — you want to maintain those precious air pockets. The top should look rustic and slightly bumpy, like a landscape of bread hills. That sizzle when it hits the pan? Absolute perfection, and a sign your pan was properly greased.
- Slide the pan into your preheated oven and bake for 35-40 minutes. Don't walk away from the oven here — around the 25-minute mark, your kitchen will start filling with the most incredible aroma, like a bakery and grandmother's house had a beautiful baby. The top should turn golden brown, and when you tap it, it should sound hollow like a drum.
- Cool in the pan for 10 minutes — this is the moment of truth where you resist the urge to dive in immediately. The bread continues cooking from residual heat, and trying to remove it too soon results in a crumbly mess that falls apart like your resolve on a diet. Run a butter knife around the edges to loosen it.
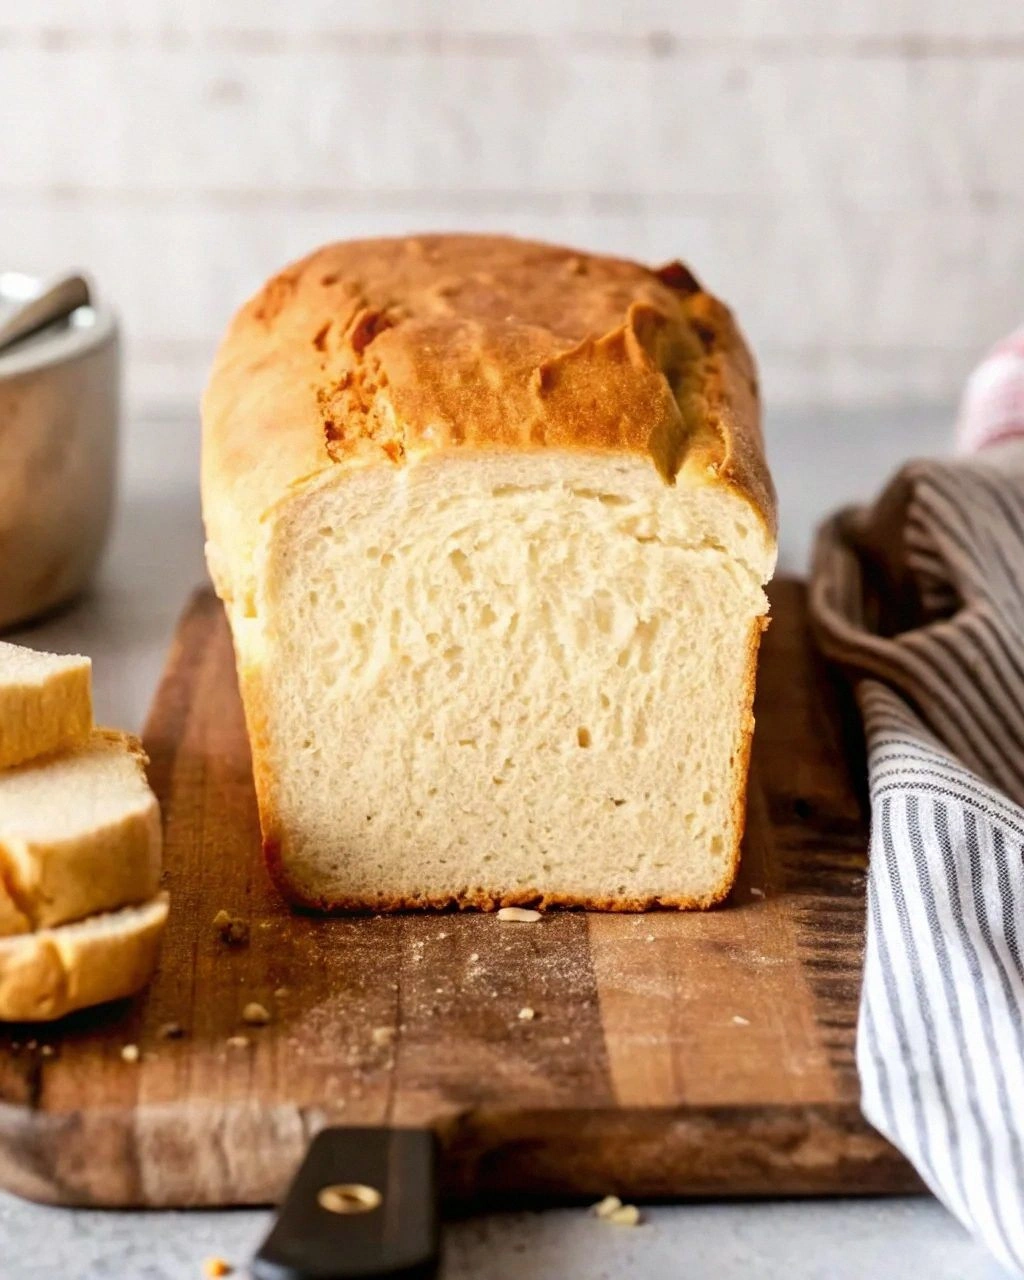
- Turn out onto a wire rack and cool completely, about 2 hours. I'll be honest — I ate half the batch before anyone else got to try it during my first successful attempt, burning my tongue in the process because patience is not my strong suit. But waiting rewards you with clean slices that don't squish under the knife.
That's it — you did it. But hold on, I've got a few more tricks that'll take this to another level and transform you from a bread-baking novice into someone who casually whips up homemade loaves like it's no big deal.
Insider Tricks for Flawless Results
After making this bread more times than I care to admit (my jeans can testify to the consequences), I've discovered some game-changing techniques that separate good bread from bread that makes people close their eyes and sigh with happiness. These aren't just suggestions — they're the difference between "this is nice" and "holy cow, you made this?!"
The Temperature Rule Nobody Follows
Room temperature ingredients aren't just a suggestion from persnickety cookbook authors — they're the secret to consistent results. Cold buttermilk straight from the fridge can make your butter resolidify into tiny flecks that create a mottled texture. Let everything sit out for 30 minutes before mixing, and you'll achieve a smooth, even crumb that looks like it came from a professional bakery. A friend tried skipping this step once — let's just say it didn't end well, and her bread had the texture of something that had been through a food processor set to "destroy."
Why Your Nose Knows Best
Your sense of smell is your most reliable doneness indicator. When the bread is perfectly baked, your kitchen will smell like warm honey and toasted wheat with a hint of butter — if you smell anything sharp or burnt, you've gone too far. This happens about 2-3 minutes before visual cues, giving you time to save your masterpiece from turning into a doorstop. Trust your nose; it's been evolving for millions of years to detect exactly this kind of goodness.
The 5-Minute Rest That Changes Everything
After mixing but before baking, let your dough rest for exactly 5 minutes. This brief pause allows the flour to fully hydrate, preventing those annoying flour pockets that taste like paste. It's like giving your ingredients a chance to get to know each other before they commit to being bread together. During this rest, the chemical leaveners start their magic, creating tiny bubbles that translate to a lighter final product.
The Pan-Sealing Secret
Creating a foil tent isn't just for preventing over-browning — it's a stealth technique for trapping steam that helps the bread rise higher. Remove the tent for the last 10 minutes of baking to let the crust develop that beautiful golden color and satisfying crunch. This two-stage approach gives you the best of both worlds: maximum rise and perfect crust.
Creative Twists and Variations
This recipe is a playground. Here are some of my favorite ways to switch things up when you want to impress people who think they've got your bread game figured out:
The Everything Bagel Remix
Add 2 tablespoons of everything bagel seasoning to the dry ingredients, and brush the top with egg wash before sprinkling with more seasoning. The result tastes like your favorite bagel married sandwich bread and had delicious babies. Cream cheese and lox on this creation will make you question everything you thought you knew about breakfast.
Cheese and Herb Explosion
Fold in 1 cup of sharp cheddar and 2 tablespoons of fresh herbs (dill and chives are my go-to) right before the dough goes into the pan. The cheese creates little pockets of melty goodness throughout, while herbs perfume every bite. Toast this and watch the cheese bubble up like edible confetti.
Harvest Moon Bread
Replace 1/2 cup of flour with whole wheat flour, add 1/4 cup pumpkin puree to the wet ingredients, and throw in 1/3 cup dried cranberries. This autumn-inspired version tastes like November in bread form, perfect for turkey sandwiches that'll make Thanksgiving leftovers jealous.
Mediterranean Escape
Mix in 1/3 cup chopped sun-dried tomatoes, 2 tablespoons chopped olives, and 1 teaspoon dried oregano. The result transports you to a Greek island where sandwiches come with a view of the Aegean Sea. This version makes killer panini that'll have you speaking with an Italian accent involuntarily.
Sweet Cinnamon Swirl
Leave out the salt, add 2 tablespoons sugar to the dough, and swirl in a mixture of 2 tablespoons butter, 1/4 cup brown sugar, and 2 teaspoons cinnamon before baking. This creates a bread that's halfway between sandwich bread and cinnamon roll, perfect for French toast that'll make you weep with joy.
Seeded Powerhouse
Add 1/4 cup mixed seeds (sunflower, pumpkin, sesame) to the dough, and sprinkle more on top before baking. These seeds toast during baking, creating nutty flavors and extra crunch that makes every bite interesting. It's like your bread went to the gym and came back with muscles.
Storing and Bringing It Back to Life
Fresh bread is a fleeting joy, but with proper storage techniques, you can extend that happiness far beyond the first day. The enemy of good bread is air, moisture, and time — but we've got weapons against all three.
Room Temperature Magic
Wrap your completely cooled bread in a clean kitchen towel, then place it in a paper bag. This old-school method lets the bread breathe while preventing it from drying out. Stored this way, your bread stays fresh for up to 3 days, though honestly, mine never lasts that long because it mysteriously disappears. Whatever you do, don't store it in plastic at room temperature — you'll create a sauna that turns your beautiful crust into something rubbery and sad.
Freezer-Friendly Forever
Slice the entire loaf once it's cool, then freeze individual slices between layers of parchment paper. This way, you can pull out exactly what you need without thawing the whole loaf. Frozen properly, your bread maintains quality for up to 3 months — though I dare you to make it last that long. Wrap the sliced loaf tightly in plastic wrap, then aluminum foil, creating an airtight seal that locks in freshness like a time capsule.
The Resurrection Method
To revive day-old bread, lightly mist it with water and warm it in a 300°F oven for 5-7 minutes. Add a tiny splash of water before reheating — it steams back to perfection, reviving the crust's crunch and the interior's softness. Microwaving works in emergencies, but wrap the bread in a damp paper towel and use 50% power for 15-second intervals to prevent rubbery disasters.