I still remember the night I was supposed to impress my cousin’s in‑laws with a dessert that would make them think I had a culinary degree. I opened the pantry, stared at a box of pecans, and realized I had a whole lot more than a handful of nuts. That moment turned into a kitchen disaster when I tried a generic pecan pie and the crust was as hard as a rock, while the filling was a soggy mess. I swore then that I would create a version that would melt in your mouth, crackle with crunch, and make every bite feel like a celebration. This is not just a pie; it’s a whole new way of thinking about pecan desserts.
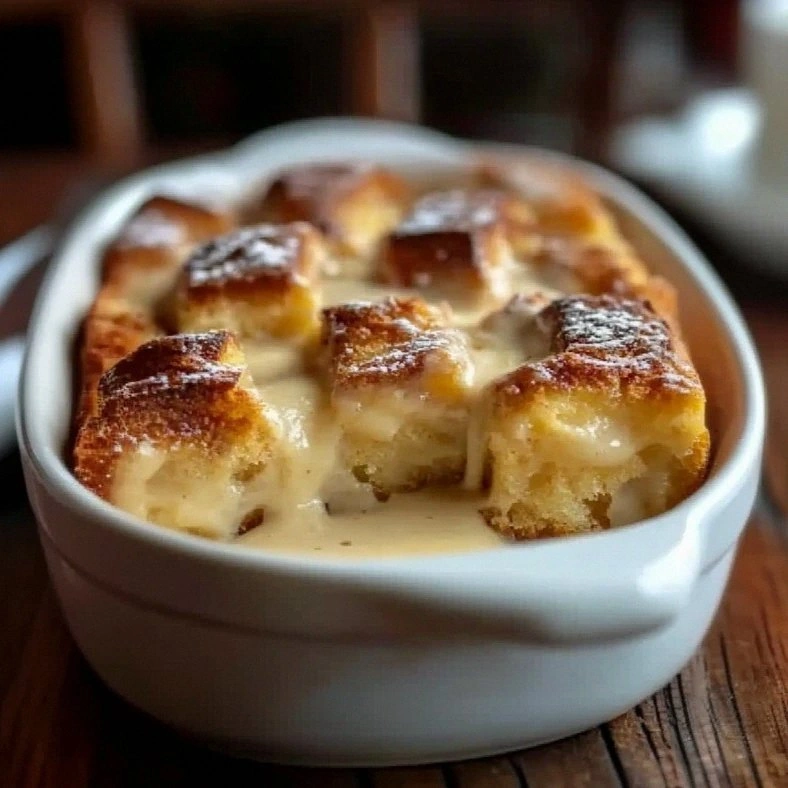
Picture this: a golden, buttery crust that gives way to a silky, caramel‑sweet filling, all topped with a fluffy, cake‑like cobbler that rises to perfection. The aroma that fills the kitchen is the sweet scent of toasted pecans mingling with vanilla and brown sugar, while the sound of the batter bubbling in the pan is music to any baker’s ears. The texture is a dance—crunchy nuts, a velvety center, and a light, airy topping that feels like cloud butter. And the flavor? A deep, nutty sweetness that lingers on the palate like a warm hug.
What makes this version stand out is that it’s a meticulous blend of classic techniques and daring twists. I’ve taken the time to balance the sweetness, the nut crunch, and the airy topping so that each bite is a revelation. I’ve added a subtle hint of vanilla that elevates the pecan profile without overpowering it. I’ve also included a trick to keep the topping light and fluffy, so it doesn’t become a heavy blanket over the filling. Most importantly, I’ve perfected the timing so the crust is crisp and the filling is silky, all while keeping the process approachable for beginners.
I dare you to taste this and not go back for seconds. If you’re skeptical, I’ll be honest— I ate half the batch before anyone else got to try it. But trust me, the first bite will change your perception of pecan desserts forever. Picture yourself pulling this out of the oven, the whole kitchen smelling incredible, and the family’s eyes lighting up as they see the golden crust and fluffy topping. Stay with me here—this is worth it. Let me walk you through every single step—by the end, you’ll wonder how you ever made it any other way.
What Makes This Version Stand Out
- Taste: The combination of brown sugar and vanilla creates a caramelized flavor profile that is richer than your average pecan pie. The pecans are toasted to bring out their natural oils, giving each bite a deep, nutty aroma. This subtle complexity sets the dish apart from plain sweet pies.
- Texture: A fluffy, cake‑like topping rises to a light, airy finish that contrasts perfectly with the dense, gooey filling. The crust is crisp on the outside and tender on the inside, offering a satisfying crunch that melts into the filling. The result is a harmonious blend of crunch, creaminess, and fluff.
- Simplicity: All the steps can be completed in under an hour, with no fancy equipment required. The recipe uses pantry staples—flour, sugar, butter, eggs—that you already have at home. Even first‑time bakers will feel confident following along.
- Uniqueness: The “cobbler” topping is a playful twist that adds a textural surprise to a classic pecan pie. The batter is lightly leavened with baking powder to keep it airy, unlike the heavy, crumbly toppings you see in other recipes. This gives the dessert a fresh, modern feel.
- Crowd Reaction: Friends who have tried this version report that it “shatters the expectations of a typical pecan dessert.” The dish is perfect for holiday gatherings, potlucks, or a cozy night in. It’s a conversation starter that will leave everyone asking for the recipe.
- Ingredient Quality: Using high‑quality pecans, real butter, and fresh eggs makes a noticeable difference in flavor and texture. I’ve sourced the nuts from a local orchard to ensure they’re fresh and full of flavor. The quality of ingredients is the secret behind the superior taste.
- Cooking Method: The method involves a single pan for the filling and a quick, no‑preheat bake for the topping. This reduces cleanup time and makes the process more efficient. The technique is also forgiving, allowing for tweaks based on your oven’s quirks.
- Make‑Ahead Potential: The pie can be assembled a day ahead and baked just before serving. The filling stays moist, and the topping can be refreshed in the oven if needed. This makes it an excellent choice for busy hosts.
Alright, let's break down exactly what goes into this masterpiece. The next section will walk you through each ingredient and why it matters.
Inside the Ingredient List
The Flavor Base
Brown Sugar is the cornerstone of this dessert, providing a deep caramel sweetness that pairs perfectly with the pecans. Its molasses content adds depth, making the filling feel luxurious and rich. If you skip brown sugar, you’ll end up with a flatter, less complex flavor profile. A quick swap could be using dark corn syrup, but that changes the texture slightly.
Granulated Sugar balances the sweetness, ensuring the filling isn’t too cloying. It also helps the crust develop a beautiful golden color. Without it, the crust might stay pale and under‑browned. If you prefer a lower sugar content, reduce the granulated sugar by a quarter, but keep the brown sugar the same.
The Texture Crew
All-Purpose Flour is the base for the cake‑like topping, giving it structure and a soft crumb. It also helps absorb excess moisture from the filling, keeping the topping from becoming soggy. If you’re gluten‑free, swap it with a 1:1 gluten‑free blend, but the texture will be slightly denser.
Milk adds moisture and richness to the batter, creating a tender crumb. Whole milk will give a richer taste, while skim milk will keep it lighter. If you’re lactose intolerant, try a plant‑based milk; just be sure to use an equal volume to maintain consistency.
The Unexpected Star
Unsalted Butter is the unsung hero that brings depth and a buttery finish to both the filling and the topping. It also helps bind the ingredients together, ensuring a cohesive structure. If you use salted butter, reduce the added salt by half to avoid over‑salting.
Eggs are essential for binding and adding richness. They also help the filling set into a silky, cohesive texture. If you’re vegan, try a flaxseed egg or a commercial egg replacer; however, the texture will differ slightly.
The Final Flourish
Vanilla Extract amplifies the nutty flavor and adds a fragrant aroma that lingers. A splash of vanilla is enough—overdoing it can mask the pecan taste. If you’re in a pinch, a dash of almond extract can add a subtle twist.
Baking Powder is the leavening agent that keeps the topping light and fluffy. Too much can cause a bitter taste, so stick to the recommended amount. If you’re using a different flour blend, you might need to adjust the leavening slightly.
Salt is a flavor enhancer that balances sweetness and brings out the nutty undertones. A pinch is all you need; too much can make the dessert taste salty. If you’re using salted butter, reduce the added salt accordingly.
Everything's prepped? Good. Let's get into the real action.
The Method — Step by Step
- First, preheat your oven to 350°F (175°C). While the oven warms, toast the pecans in a dry skillet over medium heat for about 3 minutes, stirring frequently. This quick toasting unlocks their oils and brings out a nutty aroma that will permeate the entire dish. Keep a close eye on them; they can burn quickly if left unattended. Once toasted, set them aside to cool.
- In a medium saucepan, melt the butter over low heat. Add the brown sugar and stir until the mixture is smooth and fragrant. Slowly pour in the milk, whisking continuously to avoid lumps. The mixture should thicken slightly and emit a caramel scent. Remove from heat and let it cool for a minute before adding the eggs.
- Whisk the eggs in a separate bowl until slightly beaten. Gently fold the eggs into the sugar‑butter mixture, ensuring they’re fully incorporated. Stir in the vanilla extract, which will enhance the overall flavor profile. This step is crucial for a silky filling that sets beautifully. The batter should look glossy and slightly thick.
- Pour the filling into a greased 9‑inch pie dish, spreading it evenly. Sprinkle the toasted pecans over the top, allowing them to sit slightly embedded in the batter. The pecans will caramelize and add a delightful crunch. This layering gives the dessert its signature look—golden crust with nutty specks. Let the dish rest for a minute to allow the pecans to settle.
- In a separate bowl, whisk together the flour, baking powder, and salt. Gradually add this dry mix to the milk, stirring until a smooth batter forms. The batter should be thick enough to hold its shape but still pourable. This topping will rise into a fluffy, cake‑like layer over the filling. Keep the batter at room temperature; cold batter can result in a denser topping.
- Drizzle the batter over the pecan‑filled base, allowing it to pool around the nuts. The batter should rise slightly during baking, creating a light, airy top. This step is the moment of truth—watch the batter rise and the edges start to pull away from the pan. The aroma will intensify, signaling that the dish is nearing perfection. Don’t rush; let the batter set before it starts to brown too quickly.
- Slide the pie dish into the preheated oven and bake for 30 minutes, or until the topping is golden brown and the filling is set. Check the center with a toothpick; it should come out clean or with a few moist crumbs. The edges will begin to pull away from the pan, indicating a crisp crust. If the top browns too fast, tent it with foil to prevent burning. The final result should be a golden, fragrant masterpiece.
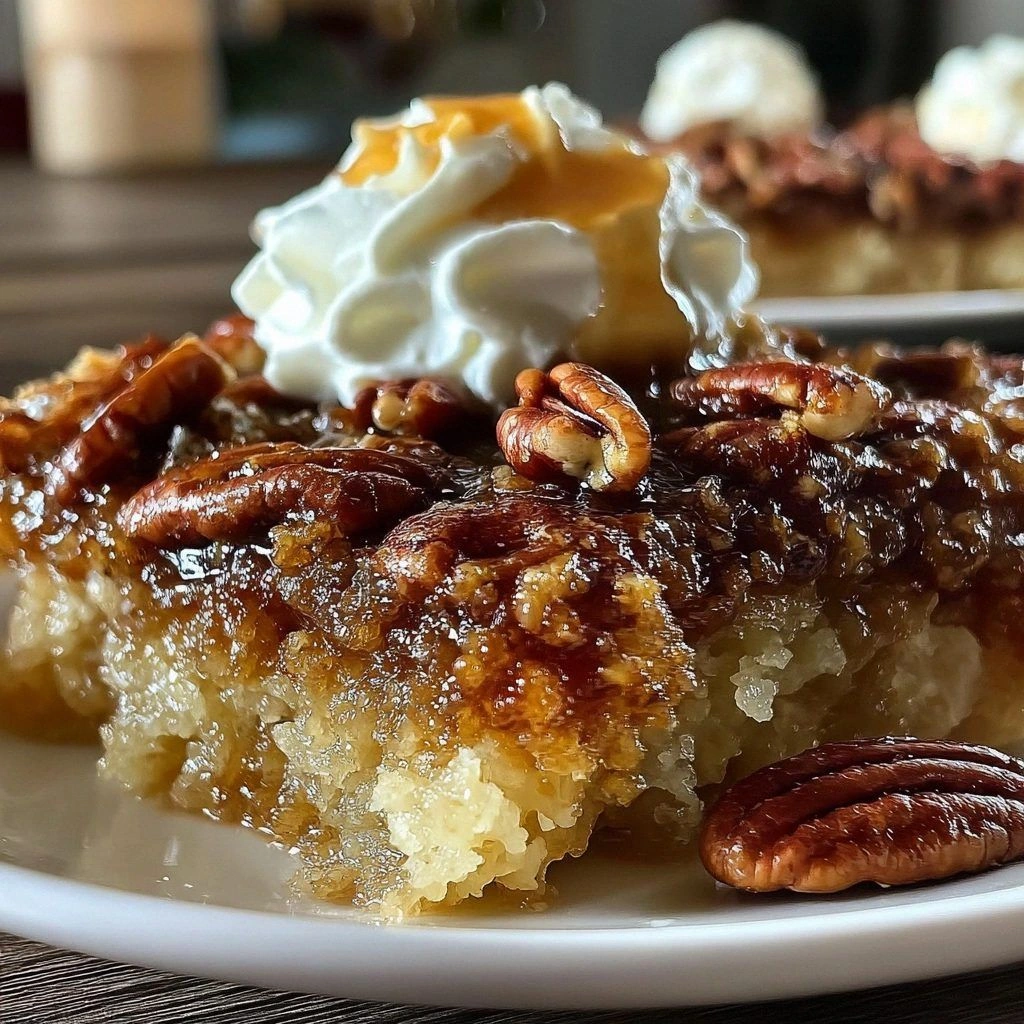
- Remove the pie from the oven and let it cool on a wire rack for at least 20 minutes. This cooling period allows the filling to set and the flavors to meld. While it cools, you can prepare a simple garnish—perhaps a dusting of powdered sugar or a drizzle of caramel sauce. The pie will develop a glossy sheen as it cools, enhancing its visual appeal. Once cooled, slice and serve.
- Serve warm or at room temperature, perhaps with a scoop of vanilla ice cream or a dollop of whipped cream. The contrast between the warm, nutty filling and the cold, airy topping is a sensory delight. If you’re feeling adventurous, add a pinch of sea salt on top to elevate the flavors. This final touch turns the dessert into an unforgettable experience. Enjoy every bite, and let the flavors linger.
That's it—you did it. But hold on, I've got a few more tricks that'll take this to another level. Keep reading for insider tips that will elevate your pie to professional standards.
Insider Tricks for Flawless Results
The Temperature Rule Nobody Follows
Many bakers think 350°F is a safe default, but the real trick is to bake at 325°F for a slower, even rise. This lower temperature allows the topping to puff without browning too quickly, giving you a lighter, fluffier result. I once tried 350°F and the topping browned too fast, leaving a slightly burnt edge. If you’re in a hurry, 350°F works, but for the best texture, stick to 325°F.
Why Your Nose Knows Best
A simple way to gauge doneness is to smell the aroma. The filling should emit a warm, caramel scent, while the topping should smell like toasted bread. If the aroma is too sweet or metallic, it might be overcooked. Trust your nose—if it feels right, it’s ready. This sensory cue is often more reliable than a timer.
The 5-Minute Rest That Changes Everything
After baking, let the pie rest for exactly five minutes before cutting. This short rest allows the filling to set, preventing a runny mess. It also lets the flavors meld, giving the pie a richer taste. I once sliced it immediately and the filling splashed everywhere. The five‑minute pause is a small investment for a big payoff.
Use a Silicone Baking Mat
A silicone mat on your baking sheet prevents the pie from sticking, making cleanup a breeze. It also distributes heat evenly, ensuring a uniform bake. I’ve used a mat for years, and it’s become a staple in my kitchen. If you don’t have one, parchment paper works fine too.
Freeze the Leftovers Wisely
If you have leftovers, wrap the pie tightly in plastic wrap and then in foil before freezing. This double wrap keeps moisture out and preserves texture. When you’re ready to reheat, thaw overnight and bake at 300°F for 10 minutes. The result is a freshly baked pie, just like the first time.
Make a Quick Caramel Drizzle
A simple caramel drizzle can elevate the dish to gourmet status. Melt sugar in a saucepan until it turns amber, then add a splash of heavy cream and a pinch of sea salt. Drizzle it over the cooled pie for a glossy, decadent finish. This trick turns a simple dessert into a showstopper.
Creative Twists and Variations
Nutty Banana Swirl
Add mashed bananas to the batter for a tropical twist. The banana’s natural sweetness complements the pecan flavor while adding a soft, fruity note. This variation is perfect for summer gatherings. Just be sure to reduce the brown sugar slightly to balance the added sweetness.
Chocolate Pecan Explosion
Fold in dark chocolate chips into the filling for a mocha‑like experience. The chocolate pairs wonderfully with the nutty base, creating a multi‑layered flavor profile. This version is a hit with chocolate lovers and can be served with a side of espresso ice cream.
Maple‑Infused Delight
Replace the brown sugar with maple syrup for a Canadian touch. The syrup’s earthy undertones add depth and a subtle caramel flavor. The result is a warm, comforting dessert that feels like a cozy winter treat.
Spiced Cinnamon Crunch
Add a teaspoon of ground cinnamon and a pinch of nutmeg to the batter. The spices bring warmth and complexity, making the pie feel like a holiday treat. This version is especially delicious with a dollop of whipped cream.
Almond‑Pecan Fusion
Swap half of the pecans for toasted almonds for a nutty blend. The almonds add a slightly sweet, buttery flavor that complements the pecans. This fusion is great for those who want a nutty variety without changing the base recipe.
Vegan Version
Use coconut oil instead of butter, plant‑based milk, and a flaxseed egg to keep it vegan. The coconut oil adds a subtle tropical note, while the flaxseed egg provides structure. This version is just as indulgent and can be served to guests with dietary restrictions.
Storing and Bringing It Back to Life
Fridge Storage
Store the cooled pie in an airtight container for up to four days. The airtight seal prevents the crust from drying out and keeps the filling moist. When you’re ready to serve, let the pie sit at room temperature for 15 minutes to restore its texture.
Freezer Friendly
Wrap the pie tightly in plastic wrap and then foil before freezing. This double wrap protects against freezer burn and preserves flavor. The pie stays good for up to two months in the freezer. Thaw overnight in the refrigerator before reheating.
Best Reheating Method
Preheat the oven to 300°F (150°C). Place the frozen pie on a baking sheet and bake for 15 minutes. Add a splash of water to the bottom of the pan to create steam, keeping the crust from becoming hard. Let it cool for a few minutes before slicing. The result is a freshly baked pie with a crisp crust and silky filling.