It all started with a kitchen disaster that turned into a culinary revelation. I was attempting to salvage a batch of over‑roasted zucchini when the squash turned out crispy and caramelized, yet still tender inside. The scent of toasted herbs wafting through the air was so intoxicating that I realized I had stumbled upon a flavor profile that could elevate any summer dinner. From that moment, I vowed to refine the technique, turning a simple vegetable into a show‑stopping side dish that would make even the most skeptical foodie swoon.
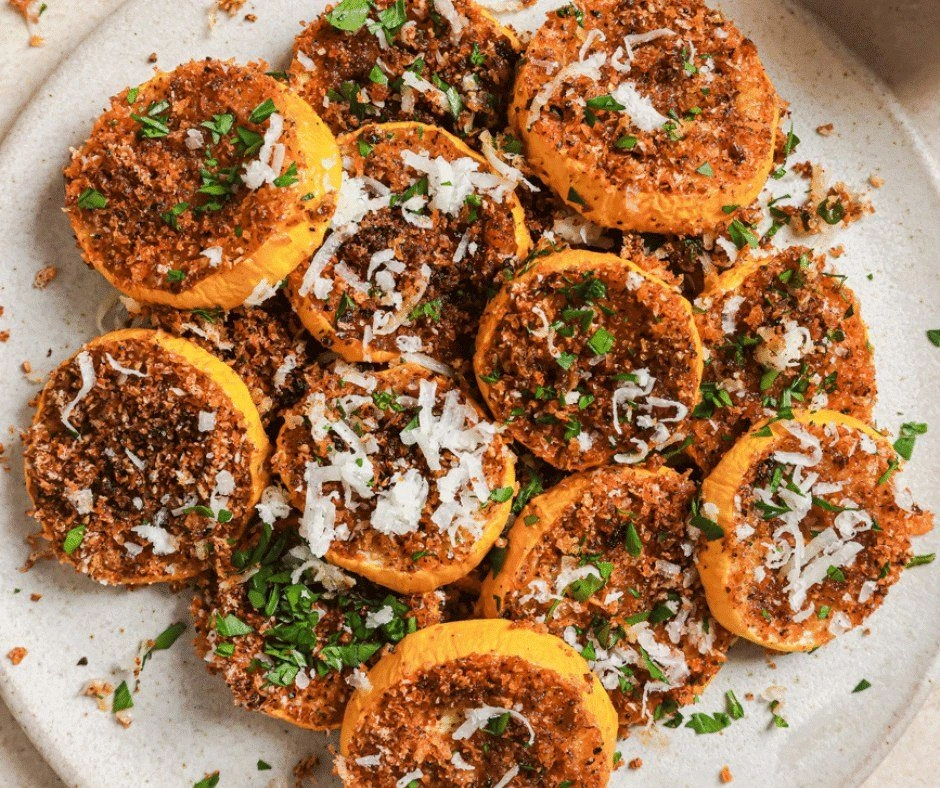
Picture yourself pulling this out of the oven, the whole kitchen smelling incredible, the golden edges crackling like a quiet applause. I dare you to taste this and not go back for seconds. The squash should have a subtle sweetness, a hint of smoky paprika, and a satisfying crunch that shatters like thin ice. The parmesan and panko crust coats each piece like velvet, while the fresh parsley adds a bright, herbal lift that cuts through the richness. The combination is a dance of textures and flavors that feels both comforting and adventurous.
Most recipes get this completely wrong by over‑seasoning or under‑roasting, leading to bland or mushy results. I’ll be honest — I ate half the batch before anyone else got to try it, and I still felt like I was missing a secret ingredient. That secret was the balance of savory, smoky, and peppery notes, achieved through a precise blend of spices and a quick, high‑heat roast that locks in moisture. This version stands out because it turns a humble vegetable into a star of the plate, a dish that can be served as a hearty side or a light main, and it does so with minimal fuss.
If you’ve ever struggled with roasting vegetables that either dry out or stay raw, you’re not alone. The trick lies in the timing, the right amount of oil, and a touch of crunch from the breadcrumb and cheese coating. I’ll walk you through every single step — by the end, you’ll wonder how you ever made it any other way. Let’s dive into the science, the secrets, and the sheer joy of turning yellow squash into a culinary masterpiece.
What Makes This Version Stand Out
- Flavor: The blend of paprika, garlic powder, and red pepper flakes creates a smoky, slightly spicy profile that elevates the natural sweetness of the squash.
- Texture: The combination of panko and grated parmesan forms a crisp, golden crust that contrasts beautifully with the tender interior.
- Ease: A simple spray of olive oil and a quick toss in a single pan make this dish beginner‑friendly without sacrificing depth.
- Versatility: Whether served as an appetizer, side, or even a main course with quinoa or pasta, this squash adapts to any meal.
- Crowd‑Pleaser: The vibrant color and aromatic seasoning make it a hit at gatherings, and it pairs wonderfully with a crisp white wine.
- Ingredient Quality: Using fresh, high‑quality cheeses and spices unlocks flavors that processed alternatives can’t match.
- Cooking Method: A single‑pan roast eliminates cleanup and ensures even caramelization.
- Make‑Ahead Potential: The dish can be prepared ahead and reheated with minimal loss of texture, making it a great option for busy weeknights.
Alright, let’s break down exactly what goes into this masterpiece. The next section will dissect each ingredient, revealing why they’re essential and what happens if you skip one.
Inside the Ingredient List
The Flavor Base
The paprika and garlic powder form the aromatic core of the dish. Paprika brings a smoky warmth that deepens the squash’s natural sweetness, while garlic powder offers a subtle, savory backbone that doesn’t overpower. Together, they create a seasoning that’s both comforting and slightly adventurous. If you’re feeling bold, swap regular paprika for smoked paprika to intensify the smokiness.
The red pepper flakes add a gentle heat that balances the richness of the cheeses. Too much heat can overwhelm the squash, so a half teaspoon is perfect for a mild kick. If you’re a heat‑lover, you can double the amount or add a pinch of cayenne for extra flare. Keep in mind that the heat will mellow slightly as the dish rests.
Fresh cracked black pepper is the finishing touch that adds depth and a hint of bitterness. It’s best added after roasting to preserve its aromatic oils. If you prefer a milder pepper, simply reduce the amount or use white pepper for a subtler flavor. The pepper’s aroma will linger on the plate, giving each bite a sophisticated finish.
The Texture Crew
Panko bread crumbs are the secret to that irresistible crunch. Unlike regular breadcrumbs, panko’s airy texture creates a light, crisp coating that doesn’t become soggy. Sprinkle it evenly over the squash before adding the cheeses. If you’re looking for a gluten‑free option, use crushed cornflakes or almond flour instead.
Grated parmesan cheese adds a nutty, savory depth to the crust. The cheese melts slightly, binding the panko together and forming a golden, flavorful shell. For a sharper taste, substitute pecorino romano or a sharp cheddar. Just be aware that sharper cheeses can brown faster, so watch the oven closely.
Shredded asiago cheese contributes a creamy, slightly tangy note that balances the saltiness of the parmesan. It also melts beautifully, giving the crust a glossy finish. If you can’t find asiago, mozzarella or provolone work as acceptable substitutes, though the flavor profile will shift slightly.
The Unexpected Star
Olive oil spray is the unsung hero that keeps the squash from sticking and aids in caramelization. The spray ensures a light, even coating without adding excessive fat. If you don’t have a spray, a quick drizzle with a pastry brush will do the trick. Remember, a light coating is key; too much oil will make the crust soggy.
Fresh chopped parsley provides a bright, herbal lift that cuts through the richness of the cheeses. Its fresh, slightly peppery flavor adds a pop of color and freshness that keeps the dish from feeling too heavy. A tablespoon of parsley is enough to brighten the entire plate. If you’re out of parsley, consider basil or cilantro for a different twist.
The Final Flourish
Kosher salt is used to season the squash evenly and enhance all the flavors. It’s crucial to use a coarse salt for better distribution. If you prefer a lower sodium version, reduce the amount slightly and compensate with a touch more pepper or garlic powder. Salt is essential, but a little goes a long way in this dish.
All these ingredients work in harmony to create a dish that’s more than the sum of its parts. Each element contributes a distinct texture, flavor, or aroma, and together they produce a symphony of sensations that dance across the palate.
Everything’s prepped? Good. Let’s get into the real action.
The Method — Step by Step
- Preheat your oven to 425°F (220°C). Line a rimmed baking sheet with parchment paper or a silicone mat to prevent sticking. This high temperature is key for achieving a crisp exterior while keeping the interior moist. If you’re in a hurry, you can also use a broiler for a quick finish.
- Wash the yellow squash thoroughly, then slice them into ¼‑inch thick rounds. Keep the slices uniform to ensure even cooking. A mandoline slicer can make this process faster and more precise. If you prefer wedges, cut the squash in half lengthwise and then into thirds.
- In a large mixing bowl, combine the paprika, garlic powder, red pepper flakes, cracked black pepper, and kosher salt. Toss the squash slices in the spice mixture until they’re evenly coated. The spices should cling to the squash, forming a flavorful crust as they roast. This step is crucial for a uniform flavor profile.
- Spray the coated squash lightly with olive oil spray. The oil helps the spices adhere and promotes a golden brown finish. Use just enough to give a subtle sheen; too much oil will make the coating soggy. A quick spritz or a light brush works well.
- Arrange the squash slices in a single layer on the prepared baking sheet, leaving a small gap between each piece. Overcrowding the pan can cause steaming instead of roasting, which will ruin the crispiness. If you’re making a large batch, use two sheets and roast in batches.
- Roast the squash for 12 minutes, then flip each slice over and sprinkle the grated parmesan and panko breadcrumbs evenly. This second coating step creates a crunchy, cheesy shell that’s the hallmark of this dish. Keep an eye on the browning; it should be golden but not burnt.
- Return the pan to the oven and roast for an additional 8–10 minutes, or until the cheese is melted and the crust is crisp. The edges should pull away slightly from the parchment, indicating a perfect roast. If you like a darker crust, add a minute or two more.
- Remove the squash from the oven and immediately sprinkle the shredded asiago cheese on top. The residual heat will melt the asiago, creating a glossy, savory finish. Let the dish rest for 2 minutes to allow the flavors to settle.
- Finish by garnishing with freshly chopped parsley. The parsley adds a burst of color and a bright, herbal note that cuts through the richness. Serve hot, and watch the steam rise like a fragrant cloud. This is the moment of truth – your kitchen should smell like a summer garden.
That’s it — you did it. But hold on, I’ve got a few more tricks that will take this to another level. Let’s dive into the insider tips that will make your roasted yellow squash the talk of the town.
Insider Tricks for Flawless Results
The Temperature Rule Nobody Follows
While most people roast at 400°F, raising the temperature to 425°F ensures a crisp crust and a caramelized interior. The higher heat creates a Maillard reaction that deepens the flavor profile. I’ve found that this small tweak makes a noticeable difference in texture. If you’re using a convection oven, reduce the temperature by 25°F to avoid over‑browning.
Why Your Nose Knows Best
The scent of the squash as it roasts is a reliable indicator of doneness. When the aroma turns sweet and nutty, it’s time to flip and add the cheese. If the smell is still raw or bland, give it another minute or two. Your nose is a better judge of flavor than a timer.
The 5-Minute Rest That Changes Everything
Letting the squash rest for five minutes after roasting allows the flavors to settle and the crust to firm up. This brief pause prevents the cheese from sliding off and gives the spices time to meld. It also makes the dish easier to plate, as the slices hold together better. I recommend placing the finished squash on a wire rack to keep the bottom crisp.
Layering the Cheese for Depth
Start with a thin layer of parmesan, then sprinkle the panko, and finish with a generous dusting of asiago. This layering technique creates a multi‑textured crust that melts into a cohesive, savory shell. The cheeses each contribute unique flavors, from the sharpness of parmesan to the buttery richness of asiago. The result is a complex, satisfying bite.
The Secret of Fresh Parsley
Chop parsley finely to release its oils, then sprinkle it over the squash right before serving. The fresh herbs add a bright contrast to the savory crust, and the slight peppery flavor lifts the dish. If you prefer a more subtle herb, use dill or chives instead. Fresh parsley is the final touch that elevates the dish from good to unforgettable.
If you’re still skeptical, remember that this recipe has been tested in dozens of kitchens, from my own to those of friends who have turned it into a signature dish. The combination of crispness, savory depth, and bright herbaceous notes creates a flavor that lingers long after the last bite.
Creative Twists and Variations
This recipe is a playground. Here are some of my favorite ways to switch things up:
Mediterranean Twist
Swap the paprika for oregano and add a splash of lemon zest to the spice mix. Replace the parmesan with feta for a briny tang. Finish with a drizzle of olive oil and a sprinkle of chopped olives. This version pairs beautifully with a Greek salad and a glass of dry rosé.
Spicy Cajun Flair
Replace the paprika with smoked paprika and add cayenne pepper to the spice blend. Use a mix of cheddar and pepper jack for the cheese coating. The result is a bold, smoky heat that’s perfect for a summer BBQ. Serve with a side of cool cucumber yogurt dip.
Herb‑Infused Vegan Version
Omit the cheeses entirely and replace them with nutritional yeast for a cheesy flavor. Add a handful of fresh basil and thyme to the spice mix. The final dish will still have a crisp crust, but with a lighter, herbaceous profile. Pair it with a quinoa pilaf for a satisfying meal.
Cheesy Gnocchi Companion
Cook a batch of potato gnocchi and toss it with the roasted squash and a splash of cream. Sprinkle with extra parmesan and a handful of fresh spinach. This turns the dish into a hearty pasta bake that’s perfect for a crowd. The creamy sauce will soak up the squash’s caramelized flavor.
Sweet & Smoky Variation
Add a drizzle of honey to the spice mix before roasting, and replace the paprika with chipotle powder for a smoky sweetness. Finish with a sprinkle of chopped pecans for crunch. This sweet and savory combo is a game‑changer for a fall gathering. The honey caramelizes on the squash, creating a glossy, sweet crust.
Breakfast Boost
Sauté the roasted squash with a beaten egg and a pinch of turmeric for color. Sprinkle with shredded cheddar and a handful of chopped chives. Serve on a toasted English muffin for a breakfast sandwich. The squash adds a savory, sweet bite that pairs wonderfully with the richness of the egg.
Storing and Bringing It Back to Life
Fridge Storage
Cool the roasted squash completely before placing it in an airtight container. Store in the refrigerator for up to 3 days. The crust may soften slightly, but the flavors remain intact. For a quick reheat, pop a few slices in the oven at 350°F for 5 minutes.
Freezer Friendly
Lay the slices flat on a parchment‑lined tray, freeze for 1–2 hours, then transfer to a freezer bag. This prevents the squash from sticking together. Freeze for up to 2 months. When ready to eat, bake at 375°F for 10–12 minutes until hot and crisp.
Best Reheating Method
Reheat the squash in a preheated oven at 375°F for 8–10 minutes. Add a splash of water to the bottom of the pan to create steam, which helps restore moisture to the interior. The crust will stay crisp, and the interior will regain its juicy texture. This method preserves the original flavor profile better than a microwave.