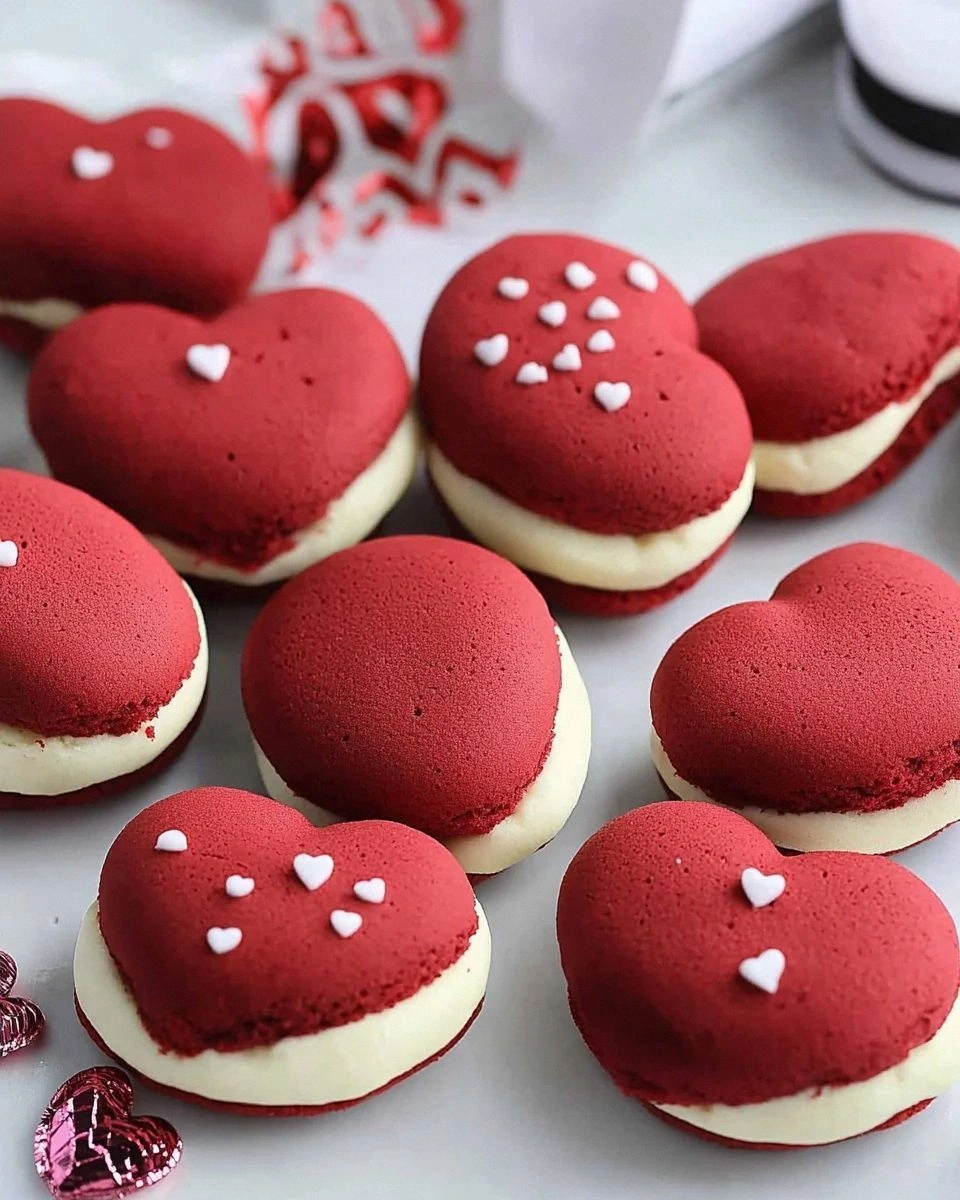
Picture this: it is eleven-thirty on a slate-gray February morning, your kitchen window fogged like a secret, and you are standing in mismatched socks, whisk in hand, trying to impress someone who once told you they “don’t really do desserts.” You have already knocked over the cocoa tin, the dog is wearing a streak of red food coloring on his ear, and you are pretty sure your favorite playlist just betrayed you with a breakup ballad. But then—then—these red velvet whoopie pies rise like Valentine miracles, their domes glossy and domed like tiny satin pillows, their scent curling through the air like a love letter written in vanilla and nostalgia. One bite and the room tilts: chocolate whispers, buttermilk sings, and that tangy cream-cheese filling slips across your tongue like silk stockings on hardwood. Suddenly the day is not gray; it is Technicolor crimson, and your “I don’t do desserts” person is standing in the doorway, eyes wide, asking, “Are those for me?” You nod. You smile. Game over. Hearts officially stolen.
I have baked my way through every red velvet gimmick on the internet—cupcakes that dry out faster than cheap lipstick, cakes that collapse like bad soufflé gossip, cookies that bleed color like a crime-scene cliché—and these whoopie pies are the only ones that keep their promise. They stay moist for three days (if they last that long), they travel in a shoebox without smushing, and they look so darling stacked in a parchment-lined tin that you will swear you have been cast in your own rom-com. The crumb is tender enough to make you close your eyes, but sturdy enough to sandwich a cloud of frosting that tastes like the best cheesecake you ever day-dreamed about. I dare you to taste the filling and not go back for seconds with a covert spoon. Honestly, I ate half the batch before anyone else got wind of it, and I do not even feel guilty—because sharing these would be like giving away the last page of a thriller.
Most recipes get red velvet completely wrong: too much cocoa and you are basically eating a weird chocolate cake with an identity crisis; too little and the signature tang disappears like a bad Tinder date. My version walks the tightrope with precision—just enough cocoa for depth, a kiss of vinegar to sharpen the edges, and buttermilk for that gentle, almost flirtatious twang. The color? A crimson that could stop traffic, achieved without emptying an entire bottle of dye into the bowl. The texture? Think velvet blazer lined with whipped cream—structured yet plush. And here is the twist you did not see coming: a whisper of espresso powder that makes the chocolate notes sing torch-song harmony rather than stepping onstage with a megaphone. Future pacing moment: imagine pulling these from the oven, your whole kitchen smelling like a sweetheart’s daydream, and you are the hero who just cracked the code to edible romance.
Stay with me here—this is worth it. We are going to brown the butter for the filling (yes, brown it, because we are adults and we deserve depth), we are going to chill the dough for exactly eighteen minutes so the pies puff without spreading into Frisbees, and we are going to use a disher scoop so every sandwich match-makes like a dating algorithm. By the end you will wonder how you ever made it any other way, and your Valentine—whether that is your spouse, your best friend, or simply your future self binge-watching period dramas—will wonder how they ever lived without you.
What Makes This Version Stand Out
- Color That Lasts: The hue stays vibrant even after baking, no sad pinkish disks here—thanks to a combo of gel color and a touch of beet powder for insurance.
- Pillow-Soft Forever: Oil and butter team up so the cakes stay plush for days; most recipes pick a side, but we play both so you win.
- Tang You Can Taste: Vinegar and buttermilk are balanced like a tightrope walker, so the trademark zing hits right after the cocoa fades.
- Filling That Holds: Brown-butter cream cheese whipped with a touch of white chocolate sets just enough not to squish out when you bite—no mortifying frosting explosions on first dates.
- Scoop-and-Bake Simplicity: No rolling pins, no heart-shaped cutters, no sweat. A medium cookie scoop gives you perfect rounds every single time.
- Make-Ahead Magic: Bake the cakes on Sunday, fill on Tuesday, serve on Valentine’s; they actually improve as flavors meld—try finding another dessert that cooperative.
- Portion Control Lie: They are handheld, so you can tell yourself you will eat just one. You will not. But you can tell yourself that.
Alright, let us break down exactly what goes into this masterpiece...
Inside the Ingredient List
The Flavor Base
Cocoa powder is the quiet kid in the corner who actually runs the whole classroom. Use natural, not Dutch-processed; you want the sharp edge to play against the buttermilk. Skimp and the cakes taste like bland vanilla with food coloring—tragic. If you only have Dutch, add an extra quarter-teaspoon of vinegar to wake it up.
Buttermilk is the soured secret handshake of red velvet. No buttermilk? Mix ¾ cup whole milk with 2 teaspoons lemon juice and wait ten minutes until it looks like curdled sunshine. The acid reacts with the baking soda to give the pies their sky-high lift. Skip this swap and your pies hibernate like flat little pancakes.
The Texture Crew
Oil keeps the crumb plush even straight from the fridge—crucial for midnight clandestine fridge raids. Butter brings flavor, so we split the fats like savvy investors diversifying a portfolio. Melted butter works, but browned butter sends nutty notes running through the batter like gossip at a small-town wedding.
Eggs should be room temperature; cold eggs re-solidify the butter and you will end up with speckled batter that looks like a dalmatian costume. Set them in a bowl of warm tap water for five minutes while you dig out the vanilla and you are golden.
The Unexpected Star
One teaspoon of espresso powder is the backstage pass to chocolate flavor amplification. You will not taste coffee; you will taste “Whoa, what is that mysterious depth?” Leave it out and the cakes are still good, but with it they are the culinary equivalent of sunglasses indoors—unnecessarily cool.
The Final Flourish
Cream cheese must be brick style, full fat, left on the counter while the cakes cool. Whipped tub cheese weeps like a tragic heroine and turns your filling into soup. If you are in a hurry, cube it and microwave on defrost for fifteen-second bursts, turning often—watch it like a Netflix cliff-hanger.
The Method — Step by Step
- Preheat your oven to 350°F (175°C) and line two sheets with parchment that actually lies flat—spray a dab of oil underneath to glue it down. In a medium bowl whisk flour, cocoa, baking soda, salt, and espresso powder until the mixture looks like midnight beach sand. Set it aside and feel smug about that espresso decision already.
- In a stand mixer, beat the softened butter and granulated sugar on medium-high for three full minutes. You want pale, fluffy clouds that could audition for a pillow commercial; anything less and your whoopie pies will have the density of hockey pucks. Scrape the bowl like you mean it—rogue sugar pockets sabotage texture.
- Drop in the egg and let the mixer run another minute; the batter should look like sunshine satin. Add oil, buttermilk, vanilla, vinegar, and red gel. The color will alarm you—like you murdered Kool-Aid—but trust the process. Mix until the batter is the shade of fresh roses kissed by scandal.
- Turn the speed to low and add the flour mixture in three hits, beginning and ending with flour. Mix just until the last dusty streak disappears; over-mixing activates gluten and you will chew these like rubber boots. The batter should mound like soft-serve on a lazy August afternoon.
- Chill the bowl for eighteen minutes—set a timer. This brief chill lets the fats firm up so the pies mound rather than melt into puddles. While you wait, brown the butter for the filling: melt it in a light-colored pan over medium heat, swirling until it smells like toasted hazelnuts and the milk solids turn chestnut. Pour into a bowl and chill five minutes so it does not melt your cream cheese later.
- Using a medium cookie scoop, drop mounds two inches apart on the prepared sheets. That sizzle when they hit the pan? Absolute perfection. Bake for ten to twelve minutes, rotating halfway, until the tops spring back like gentle trampolines and a toothpick comes out with a few moist crumbs. Cool on the sheet five minutes, then transfer to racks. Smell them and try not to weep.
- For the filling, beat the cream cheese until smooth as gossip, scrape the bowl, then add the cooled brown butter and whip until combined. Toss in powdered sugar, vanilla, and a pinch of salt; beat until it looks like luxurious cloud frosting you want to roll around in. If you over-whip and it goes loose, chill ten minutes and rewhip—culinary second chances are beautiful.
- Pair similarly sized cakes bottom-to-bottom like matchmaking. Pipe or spoon a generous dollop—about two tablespoons—onto the flat side of one cake and sandwich gently. Press until the filling peeks like a bashful secret, then roll the edges in holiday sprinkles if you crave extra sparkle. Repeat until you have a platter of crimson moons ready to break hearts.
That is it—you did it. But hold on, I have got a few more tricks that will take this to another level...
Insider Tricks for Flawless Results
The Temperature Rule Nobody Follows
Everything at 68°F bakes evenly; colder batter spreads, warmer batter domes then collapses. If your kitchen is glacier-like, microwave the mixing bowl ten seconds before scooping. If it is sauna-like, chill the sheet pans five minutes. Your thermostat is the puppet master of puff.
Why Your Nose Knows Best
When the cocoa aroma shifts from raw to toasted—about eight minutes in—that is the cue the edges are setting. Do not wait for a visual golden; red velvet fools you by staying fashionably pale. Trust the scent like a bloodhound on a mission.
The 5-Minute Rest That Changes Everything
After mixing the batter, let it stand five minutes before scooping. Hydration equals tenderness; the flour drinks the liquid and the leavening gets a head start. A friend tried skipping this step once—let us just say it did not end well. Her pies had the texture of coasters.
Fill Then Chill
Once assembled, park the pies in the fridge twenty minutes. The filling firms, the cakes relax into each other, and when you bite, you get a unified snap rather than squish-slide disaster. Future pacing: picture yourself presenting these on a vintage cake stand, every sandwich pristine.
Creative Twists and Variations
This recipe is a playground. Here are some of my favorite ways to switch things up:
Midnight Velvet
Swap half the cocoa for black cocoa and add a shot of strong coffee to the batter. The result is almost black with a bittersweet edge—perfect for the Valentine who claims they “don’t like sweet things” yet devours an entire sleeve of Oreos at 2 a.m.
Ruby Raspberry Hearts
Pulse freeze-dried raspberries into dust and fold two tablespoons into the filling; the tang marries the cream cheese like soulmates who finish each other’s sentences. Roll the edges in more raspberry dust for Valentine confetti that tastes like summer romance.
Spicy Sweetheart
Add a quarter-teaspoon cayenne to the cake batter and a whisper of cinnamon to the filling. The heat sneaks in at the end like a plot twist—your guests will pause, smile, and reach for another, puzzled and delighted.
Golden Velvet
Omit the cocoa and red dye, add extra vanilla and a pinch of turmeric for sunny cakes. Fill with lemon cream cheese for a bright, spring-flirty version that screams picnic proposal vibes.
Chocolate Stout Velvet
Replace buttermilk with reduced stout beer; the malty depth turns the cakes into brooding poets. Pair with a dark-chocolate ganache filling and serve with tiny glasses of the same stout for a Valentine’s beer-and-cookie flight.
Mini Martini Pies
Scoop with a teaspoon for bite-size sandwiches; brush the tops with a whisper of vodka mixed with edible shimmer, then fill with cream cheese spiked with a teaspoon of gin and a grating of lime zest. Serve chilled in mini cupcake liners—cocktail hour meets dessert.
Storing and Bringing It Back to Life
Fridge Storage
Layer in an airtight container with parchment between—stack them like sweet, secret love letters. They keep four days, though I have never witnessed such restraint. Bring to room temp thirty minutes before serving; cold fat dulls the flavor like a fogged mirror.
Freezer Friendly
Flash-freeze assembled pies on a tray until solid, then slip into freezer bags with the air sucked out like you are vacuum-sealing romance. Freeze up to two months. Thaw overnight in the fridge, then let stand at room temp twenty minutes. The texture rebounds like a love letter you reread.
Best Reheating Method
If you must warm them (say, for ice-cream sandwich alchemy), wrap in foil and heat at 300°F for five minutes. Add a tiny splash of water to the foil pouch before sealing—it steams back to pillowy perfection. Microwaves turn them rubbery; avoid like a bad ex.