I was standing in my kitchen, watching a neighbor's oven timer beep for the 45th time, and I realized I had a problem: my apple pie was a sad, soggy lump of batter that tasted like it had been left on a hot stove for too long. That moment sparked a fire in my culinary soul, and I declared to myself that I would create an apple pie experience that would make every other pie in the world look like a half‑baked joke. I wanted something that would be simple enough for a busy weeknight, yet decadent enough to feel like a dessert worthy of a five‑star restaurant. The answer? A handheld, caramel‑coated apple bite that you can pop into your mouth like a candy and then feel the buttery crust crackle like fresh snow under your tongue.
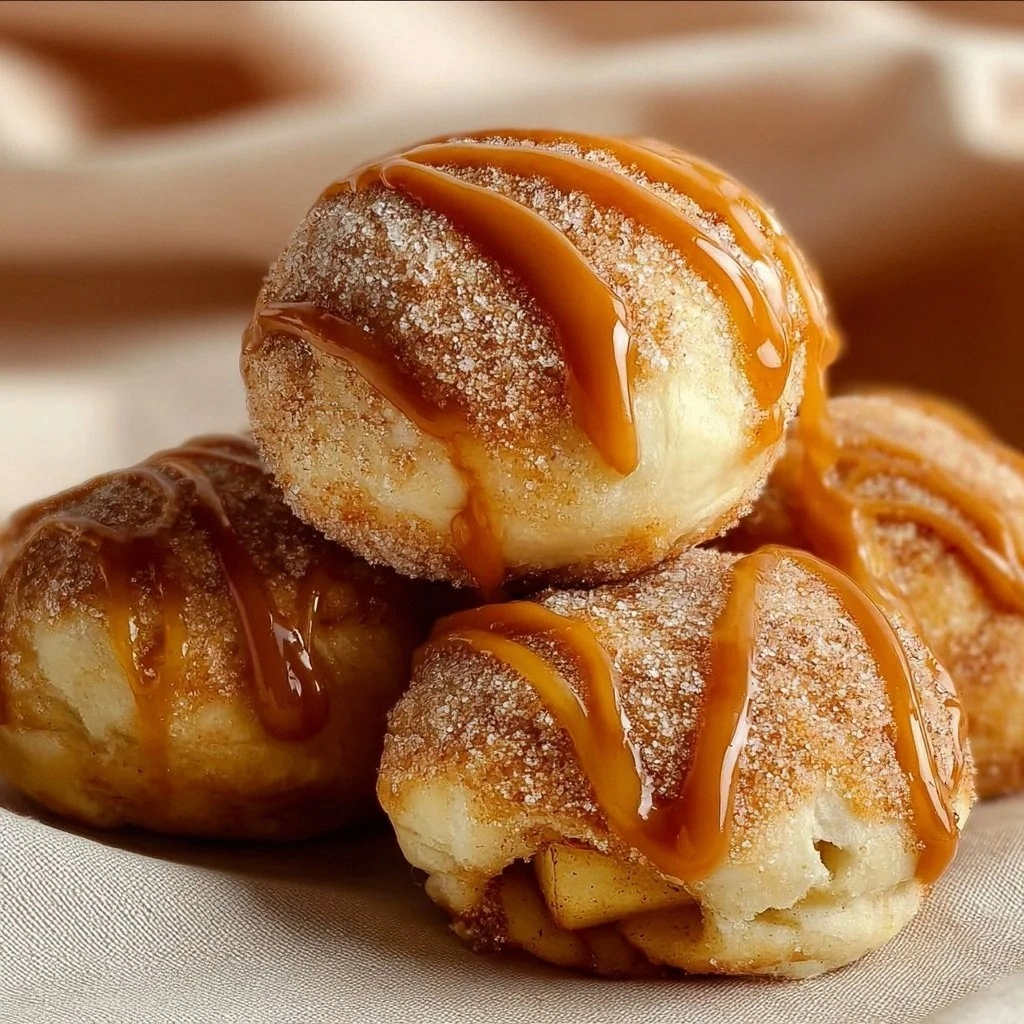
Picture this: the kitchen fills with the warm, buttery scent of biscuit dough baking, the faint metallic tang of a caramel sauce bubbling in a saucepan, and the sweet, crisp aroma of apples sautéed with cinnamon. The sound is a comforting hiss as the apples soften, the gentle clink of a spoon against a metal pan, and the satisfying pop of a biscuit crust cracking as you lift it. The sight is a golden, caramel‑glazed apple nestled in a flaky, buttery shell—like a sun‑kissed jewel on a velvet pillow. The taste is a perfect marriage of sweet, tart, and buttery, with a caramel glaze that coats each bite like velvet, while the crisp edges shatter like thin ice. The texture is a delightful contrast between the soft, caramel‑laden apple center and the crisp, buttery crust that yields with a satisfying bite.
Why does this version stand out? Because it takes the classic apple pie and transforms it into a bite‑size, portable treat that delivers all the nostalgia of a slice of pie but in a single, hand‑held bite. It uses a quick, no‑fuss biscuit dough as the base, eliminating the need for a pie crust or a pastry chef’s skill set. The caramel sauce isn’t just a topping; it’s a flavor layer that adds depth, richness, and that irresistible glossy sheen. The method is so simple that even a novice can master it in under an hour, yet the result feels luxurious enough to serve at a dinner party or as a sweet after‑dinner snack. It’s the kind of recipe that will make you say, “I dare you to taste this and not go back for seconds.”
And the best part? I’ve discovered a trick that most recipes overlook: using the leftover biscuit dough to create a caramel apple “bomb” that expands in the oven, giving you a puffed, airy crust that’s almost like a miniature croissant. This technique not only adds texture but also ensures that each bite is a little explosion of flavor, a bite that feels like a secret weapon in your culinary arsenal. So if you’ve ever struggled with pie crusts that turn out soggy or caramel that runs off the plate, this recipe is your salvation. Let me walk you through every single step—by the end, you’ll wonder how you ever made it any other way.
What Makes This Version Stand Out
- Flavor: The caramel sauce doesn’t just coat; it permeates the biscuit dough, creating a buttery, sweet depth that elevates each bite beyond ordinary apple pie.
- Texture: The biscuit base crisps to a golden crunch while the apple center remains tender and juicy, giving a satisfying contrast that’s impossible to resist.
- Speed: From prep to finish, the entire process takes less than 45 minutes, making it ideal for last‑minute dessert cravings.
- Portability: These bombs are bite‑size, making them perfect for parties, picnics, or a quick snack that doesn’t require a fork.
- Make‑Ahead: You can assemble them a day ahead, refrigerate, and bake right before serving, saving you valuable time on the day of the event.
- Ingredient Quality: The use of fresh apples and store‑bought caramel sauce that’s thick enough to hold its shape ensures a high‑quality result without the need for specialty items.
- Audience: Whether you’re a seasoned baker or a kitchen newbie, this recipe is designed for anyone who loves apple pie without the hassle.
- Visual Appeal: The glossy caramel glaze and the golden, puffed crust make for an Instagram‑worthy presentation that will wow your friends.
Alright, let’s break down exactly what goes into this masterpiece…
Inside the Ingredient List
The Flavor Base
The apples are the star of the show, and their choice determines the overall flavor profile. I prefer Granny Smith for its tartness, which balances the sweetness of the caramel and sugar. If you’re craving a sweeter bite, Fuji or Honeycrisp will give you that honeyed finish. Regardless of variety, always peel and dice the apples uniformly so they cook evenly and release their juices in a single, harmonious burst.
The Sweet Layer
The ½ cup of sugar isn’t just for sweetness; it caramelizes with the apples, creating a glossy glaze that coats the dough. If you’re feeling adventurous, swap half of the sugar with brown sugar to introduce molasses undertones. This subtle change turns a simple apple pie bomb into a caramel‑brownie hybrid that’s both nostalgic and innovative.
The Spice Factor
One teaspoon of cinnamon is a small but mighty addition that unlocks the full potential of the apples. The warm, aromatic spice amplifies the fruit’s natural sweetness and gives the dish a comforting, familiar scent reminiscent of autumn afternoons. For a more exotic twist, try a pinch of nutmeg or allspice, but keep the cinnamon as the backbone of this flavor profile.
The Unexpected Star
Caramel sauce is the secret sauce—literally. Store‑bought caramel works wonderfully, but if you have the time, homemade caramel is unbeatable. The key is thickness; it should be thick enough to coat the apples without dripping off the crust. A thicker sauce also adds a silky, velvety mouthfeel that makes each bite feel like a luxury treat.
The Final Flourish
The egg wash is the finishing touch that gives the bombs a beautiful golden color and a subtle sheen. If you’re avoiding eggs, a simple mixture of cornstarch and water can serve as a reliable substitute. Finally, the sugar sprinkled on top adds a sweet crunch that contrasts with the soft interior. Opt for turbinado sugar for an extra nutty flavor or skip it if you prefer a cleaner taste.
Everything’s prepped? Good. Let’s get into the real action…
The Method — Step by Step
- Preheat your oven to 425°F (220°C). Line a baking sheet with parchment paper to prevent sticking. This high temperature is crucial for creating a puffed, golden crust that’s crisp on the outside and tender on the inside. As the oven warms, you’ll notice the faint scent of baking dough—a promise of the deliciousness to come.
- Open the can of refrigerated biscuit dough. Separate the dough into individual biscuits; each will become one bite‑size bomb. Gently press each biscuit flat with your palm, then use a round cutter (about 2 inches in diameter) to cut out circles. The circles should be slightly larger than the baking sheet squares to allow room for the caramel glaze to spread.
- In a small saucepan, melt the caramel sauce over medium heat. Stir continuously to prevent scorching, and watch for the sauce to thicken to a syrupy consistency. The caramel should be thick enough to coat the apples but still pourable. This step is the heart of the flavor; a good caramel will make the whole dish sing.
- Add the diced apples to the caramel, then sprinkle the sugar and cinnamon. Stir until the apples are evenly coated and the sugar dissolves into a glossy glaze. Let the mixture cook for 2–3 minutes, just long enough for the apples to soften slightly but still retain a bite. This is the moment of truth—if the apples are too mushy, the final product will lose its structure.
- Place a spoonful of the caramelized apple mixture onto the center of each biscuit circle. Spoon it carefully, ensuring it doesn’t overflow onto the edges. The apples should sit snugly in the dough, creating a pocket of sweet, warm fruit that will be sealed by the crust.
- Fold the dough over the apples to create a half‑moon shape. Gently press the edges together with your fingertips, then crimp them with a fork to seal. The crimped edge not only holds the filling but also creates a decorative pattern that adds a touch of elegance to each bite.
- Whisk the egg with a splash of water to create a light egg wash. Brush the tops of the bombs with the wash; this will give them a beautiful, glossy finish when baked. Sprinkle a light dusting of sugar over the top of each bomb for that final sweet crunch. The sugar will caramelize slightly, adding a delightful texture contrast.
- Arrange the bombs on the prepared baking sheet, spacing them about 1 inch apart. Bake for 12–15 minutes, or until the edges are golden brown and the crust puffs up. The interior should still be slightly warm and gooey. Remove from the oven and let them cool on the sheet for 5 minutes before transferring to a wire rack.
- Serve immediately, or store in an airtight container at room temperature for up to 24 hours. For a warm, comforting dessert, reheat them in a 350°F oven for 3–5 minutes before serving. The caramel will melt slightly, creating a luscious, glossy glaze that will make each bite irresistible.
That’s it— you did it. But hold on, I’ve got a few more tricks that’ll take this to another level…
Insider Tricks for Flawless Results
The Temperature Rule Nobody Follows
Baking at 425°F is key to getting that puffed, airy crust. If you lower the temperature, the dough will spread and become flat, losing the coveted texture. Keep the oven rack in the center to ensure even heat distribution. I’ve found that preheating for at least 15 minutes makes all the difference.
Why Your Nose Knows Best
Before you start, inhale the caramel aroma. Your nose will tell you if the caramel is too thin or too thick. A syrupy caramel smells rich and buttery, while a watery one will be almost imperceptible. Trust that instinct—if it smells off, adjust the heat or add a splash of butter.
The 5‑Minute Rest That Changes Everything
After baking, let the bombs rest on the sheet for exactly 5 minutes. This pause allows the interior to set, preventing the filling from spilling out when you pick them up. The rest also lets the caramel glaze thicken slightly, giving a glossy finish that’s irresistible.
Use the Leftover Biscuit Dough
If you have extra biscuit dough, roll it into thin sheets and cut into small squares. These can be baked separately to make a crunchy caramel crumble that you can sprinkle over the finished bombs for an extra crunch. It’s a simple way to use every bit of dough and add texture.
Keep the Apples Fresh
To avoid brown spots, toss the diced apples with a splash of lemon juice before cooking. The acid prevents oxidation and keeps the apples bright and crisp. This trick is especially useful if you’re prepping the bombs ahead of time.
Creative Twists and Variations
Nutty Caramel Explosion
Add a handful of chopped pecans or walnuts to the caramelized apple mixture. The nuts will give a satisfying crunch and a buttery depth that pairs beautifully with the caramel glaze. This variation is perfect for a holiday gathering where you want a little extra flavor.
Cinnamon‑Spiced Coconut Crunch
Sprinkle toasted coconut flakes over the finished bombs for a tropical twist. The coconut adds a subtle sweetness and a chewy texture that contrasts nicely with the crisp crust. It’s a quick way to elevate the dish without adding extra steps.
Chocolate‑Covered Delight
After baking, drizzle melted dark chocolate over the warm bombs. The chocolate will set into a glossy shell, creating a chocolate‑caramel apple hybrid. This version is ideal for chocolate lovers and makes for a stunning dessert display.
Maple‑Infused Sweetness
Replace half the sugar in the caramel mixture with pure maple syrup. The maple adds a subtle, earthy sweetness that complements the apple’s tartness. This variation is especially lovely during the fall when maple flavors are in season.
Spiced Apple Cinnamon Swirl
Before baking, swirl a mixture of cinnamon, nutmeg, and a pinch of cloves into the apple caramel. The spices will infuse the entire bomb with a warm, aromatic profile that feels like a cozy autumn afternoon. It’s a simple tweak that elevates the flavor.
Miniature Cinnamon Rolls
For a playful twist, replace the biscuit dough with pre‑rolled cinnamon roll dough. The result is a sweet, gooey center with a buttery, caramelized exterior. This variation turns the bombs into a miniature version of the classic breakfast treat.
Storing and Bringing It Back to Life
Fridge Storage
Store the cooled bombs in an airtight container in the refrigerator for up to 3 days. The caramel will firm up slightly, but a quick reheating in a 350°F oven for 2 minutes will restore the glossy glaze. Keep them on a wire rack to prevent condensation from making the crust soggy.
Freezer Friendly
For longer storage, wrap each bomb individually in parchment paper and place them in a freezer bag. They can be frozen for up to 2 months. Thaw at room temperature for 30 minutes before reheating as described above. Freezing preserves the texture and flavor without compromising quality.
Best Reheating Method
Reheat the bombs in a preheated 350°F oven for 3–5 minutes, or until the caramel is glossy and the crust is warm. Avoid microwaving, as it can make the crust soggy. For an extra touch, dust the reheated bombs with a light sprinkling of turbinado sugar for a caramelized crunch.